Surveys & Polls
This document provides a comprehensive guide on how to create, manage, and analyze surveys using the Carrick Health platform. Surveys are an essential tool for gathering feedback and insights from your contacts, allowing you to understand their perspectives effectively.
Getting Started with Surveys
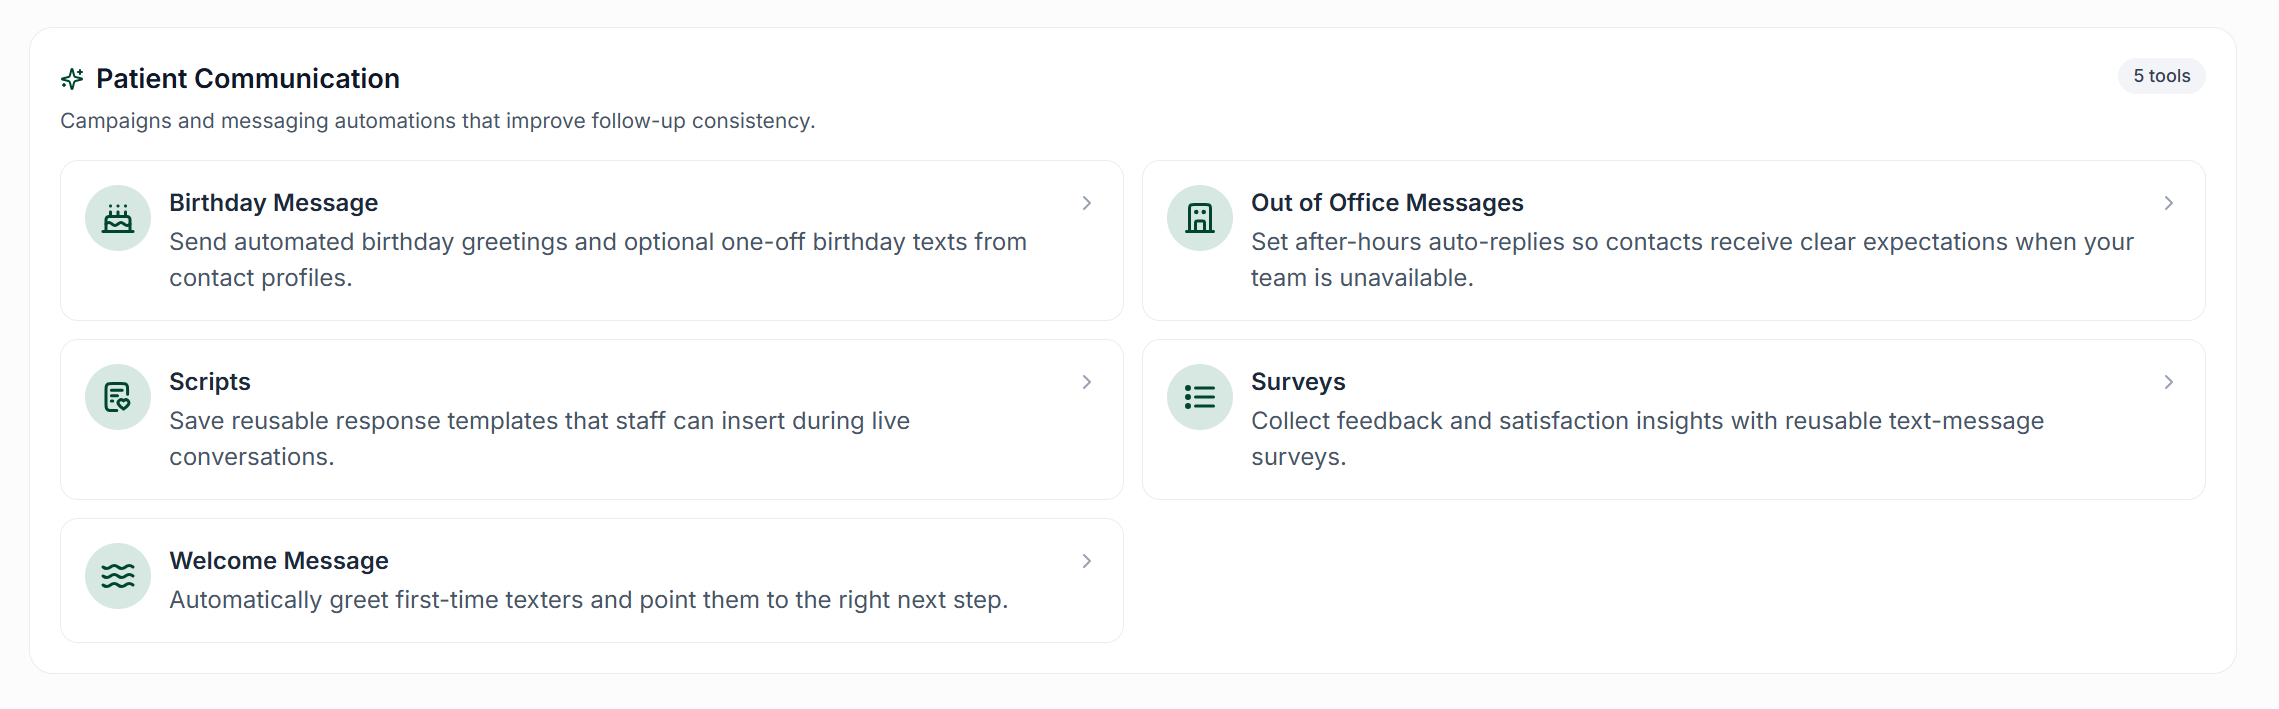
To begin using the survey feature, navigate to the "Workflows" page and click on the "Surveys" option. Here, you will find a list of all your past and current surveys. To initiate the creation of a new survey, click on the "Create New Survey" button.
Creating a Survey
The first step in creating a survey is to assign it a name. This name is for your internal records only and will not be visible to your contacts. It helps you easily locate the survey in the future.
Next, enter your question in the designated question box. To provide possible responses, list each response on a separate line in the "Survey Options" box.
After composing your question and responses, click on the "Add Message to Survey" button to save your input. You can add multiple questions and responses, and each question will be sent sequentially as the contact answers the previous one.
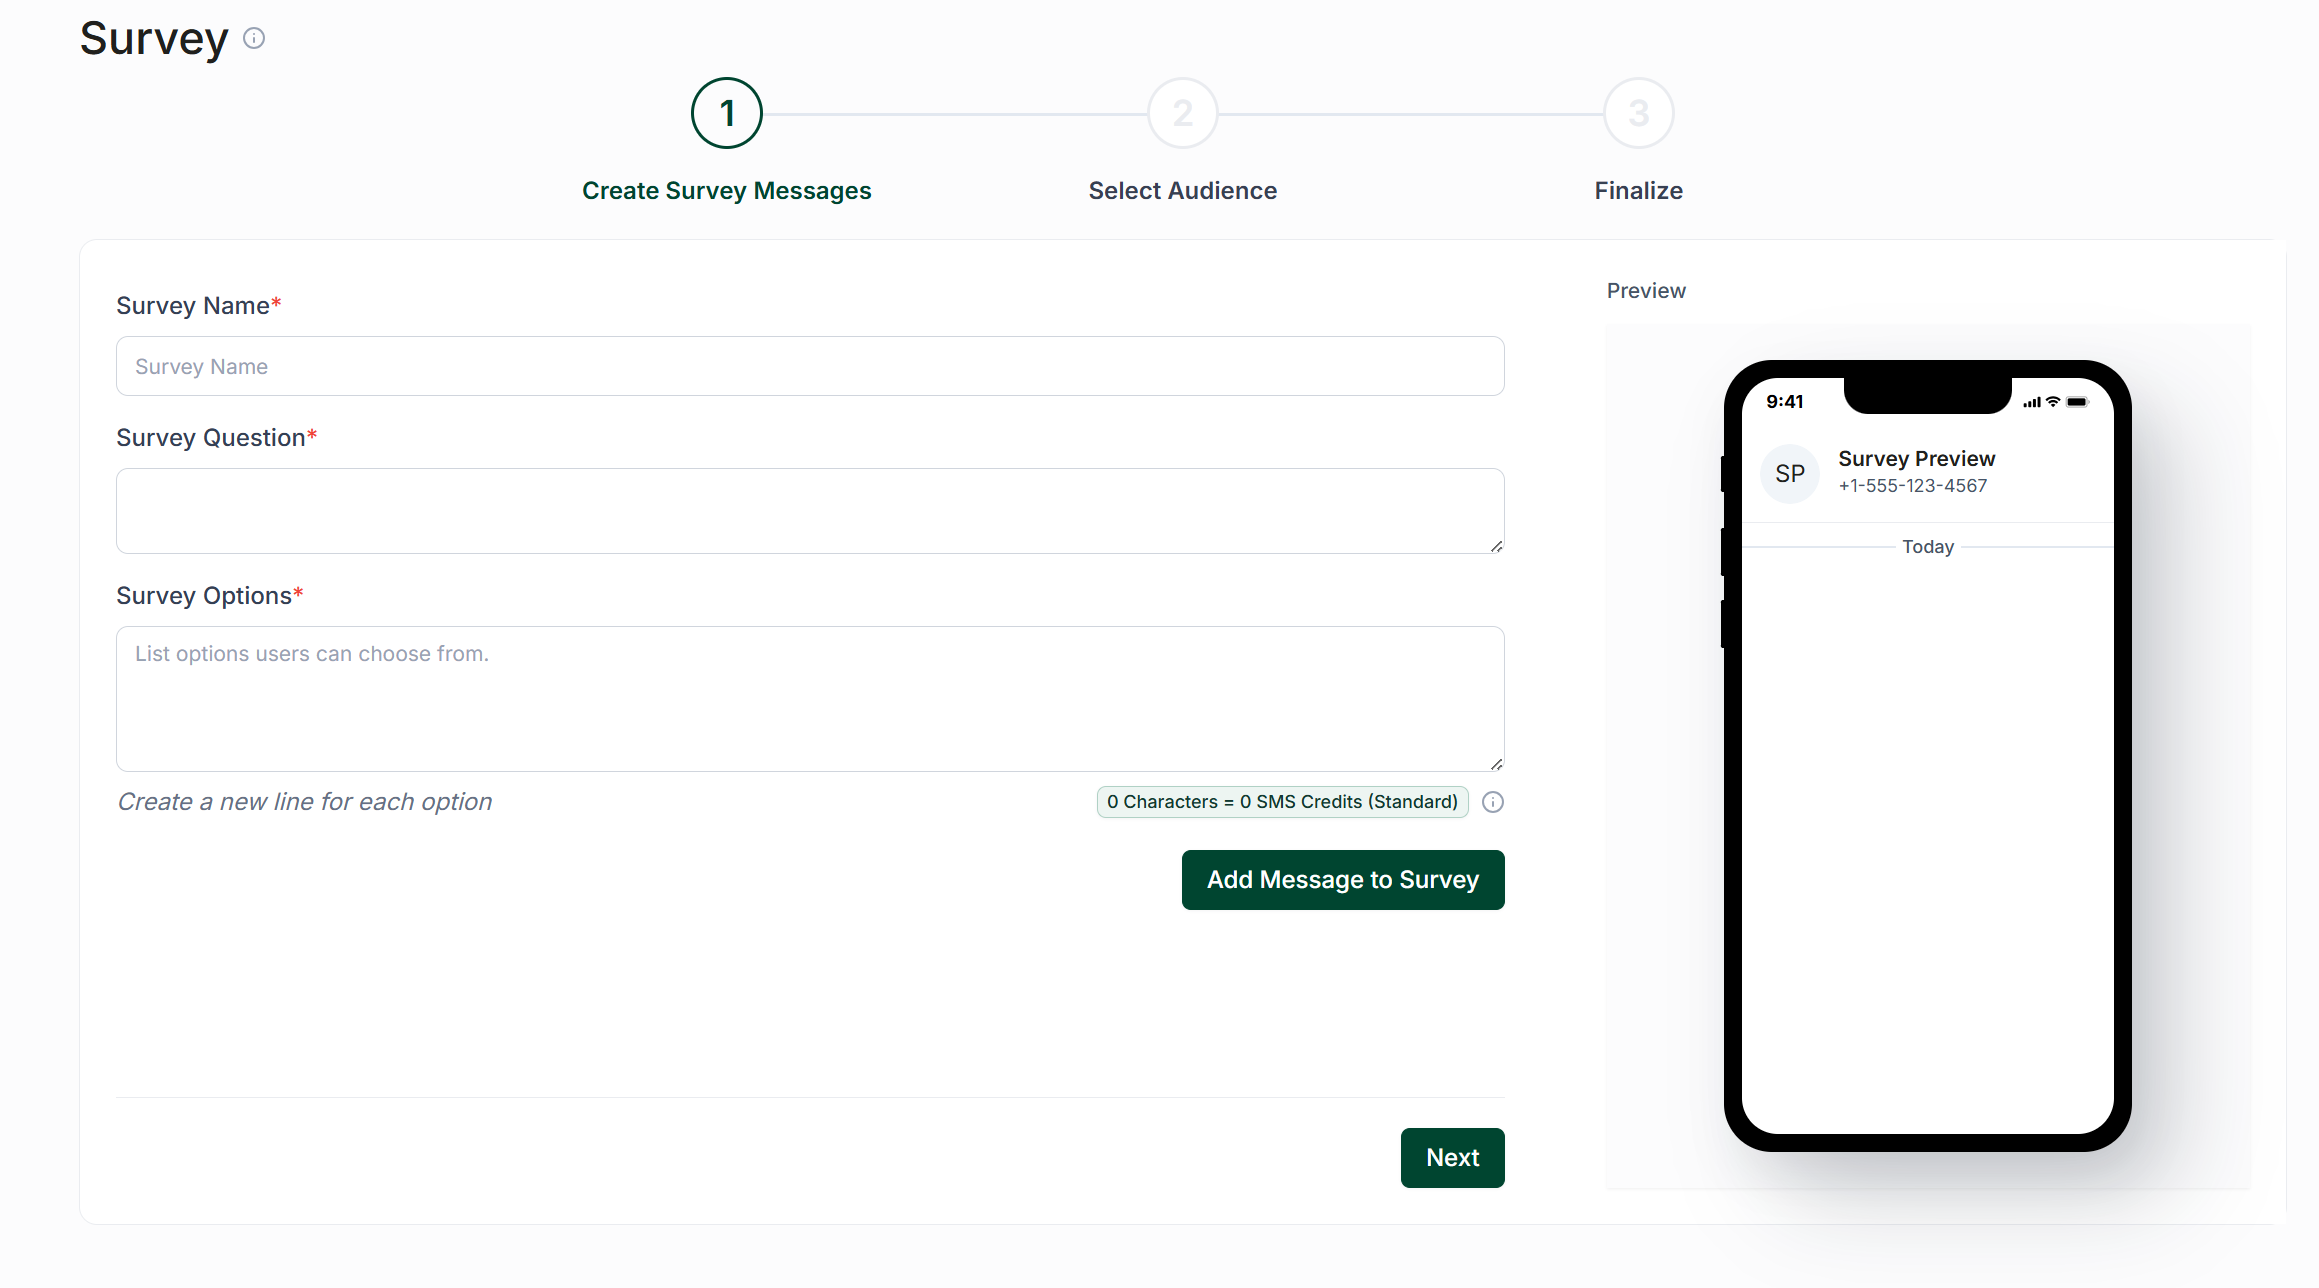
Once you have added all desired questions, click "Next" to proceed to the Select Audience step.
Selecting Your Audience
In this section, you will see lists of your segments and tags. Choose the group or groups of contacts you wish to include in your survey. You can select segments, tags, or a combination of both. Rest assured, if a contact belongs to multiple selected groups, they will only receive the survey once.
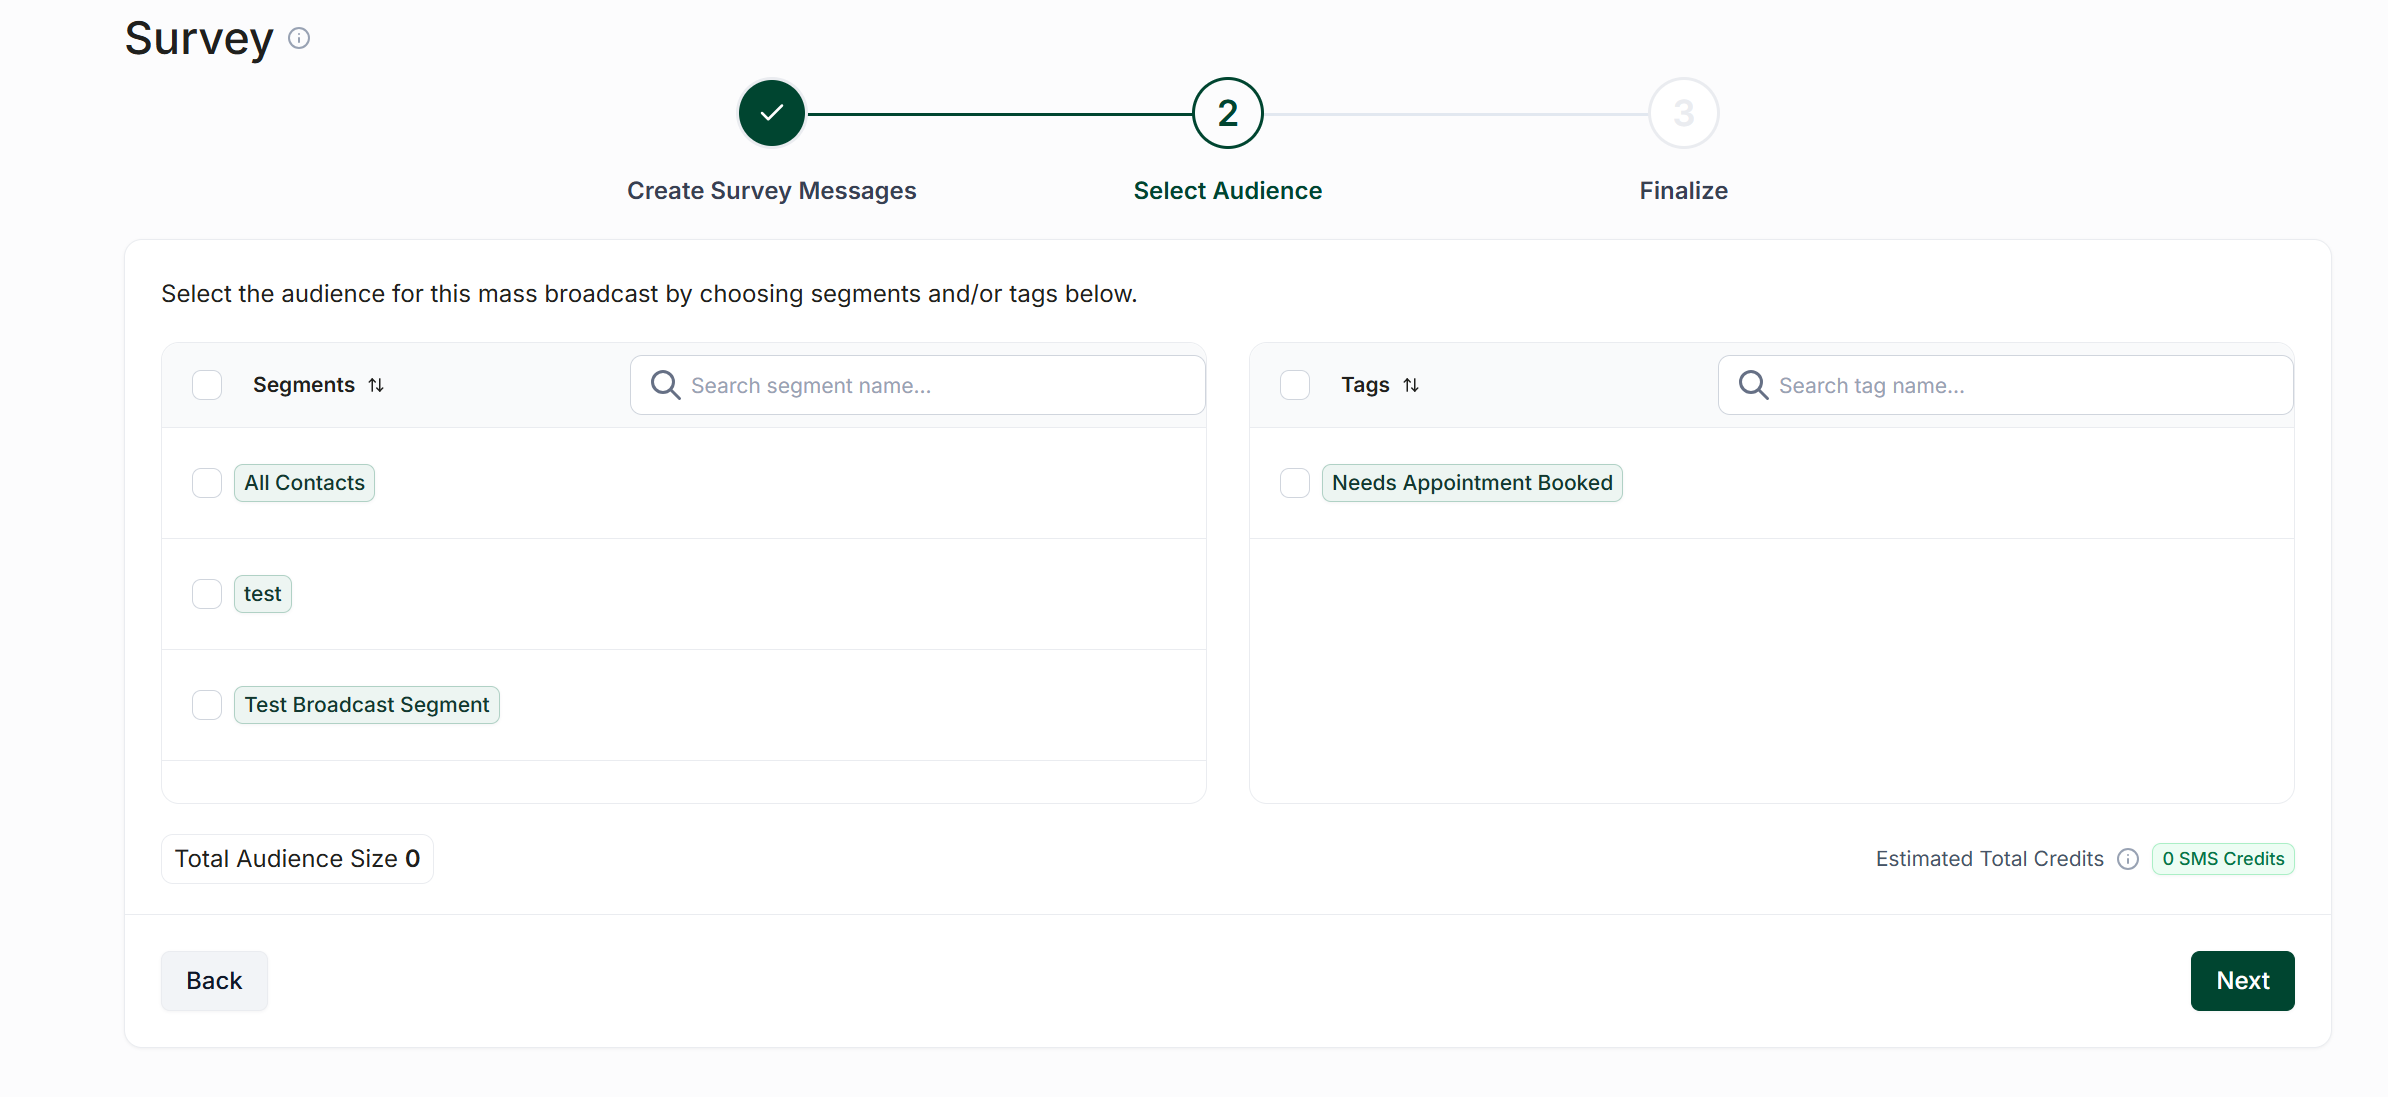
After selecting your audience, click "Next" to finalize the survey.
Finalizing Your Survey
At this stage, you can preview the message you intend to send, set the time for sending, and view the total SMS credits required to reach your audience.
The default date and time for sending the message will be the current time. However, you have the option to schedule the survey for a future date and time if desired. If you do not make any changes, the message will be sent immediately after you complete the setup.
Below the date and time picker, you will find the estimated completion time. Please note that while the first recipients will receive the message promptly, it may take until the estimated completion time for all messages to be delivered to every contact.
You also have the option to send a sample of the survey to yourself to see how it appears on your device. Click the "Send Sample Message" button above the survey preview for this feature.
Once you have selected the desired time, click the "Finish" button.
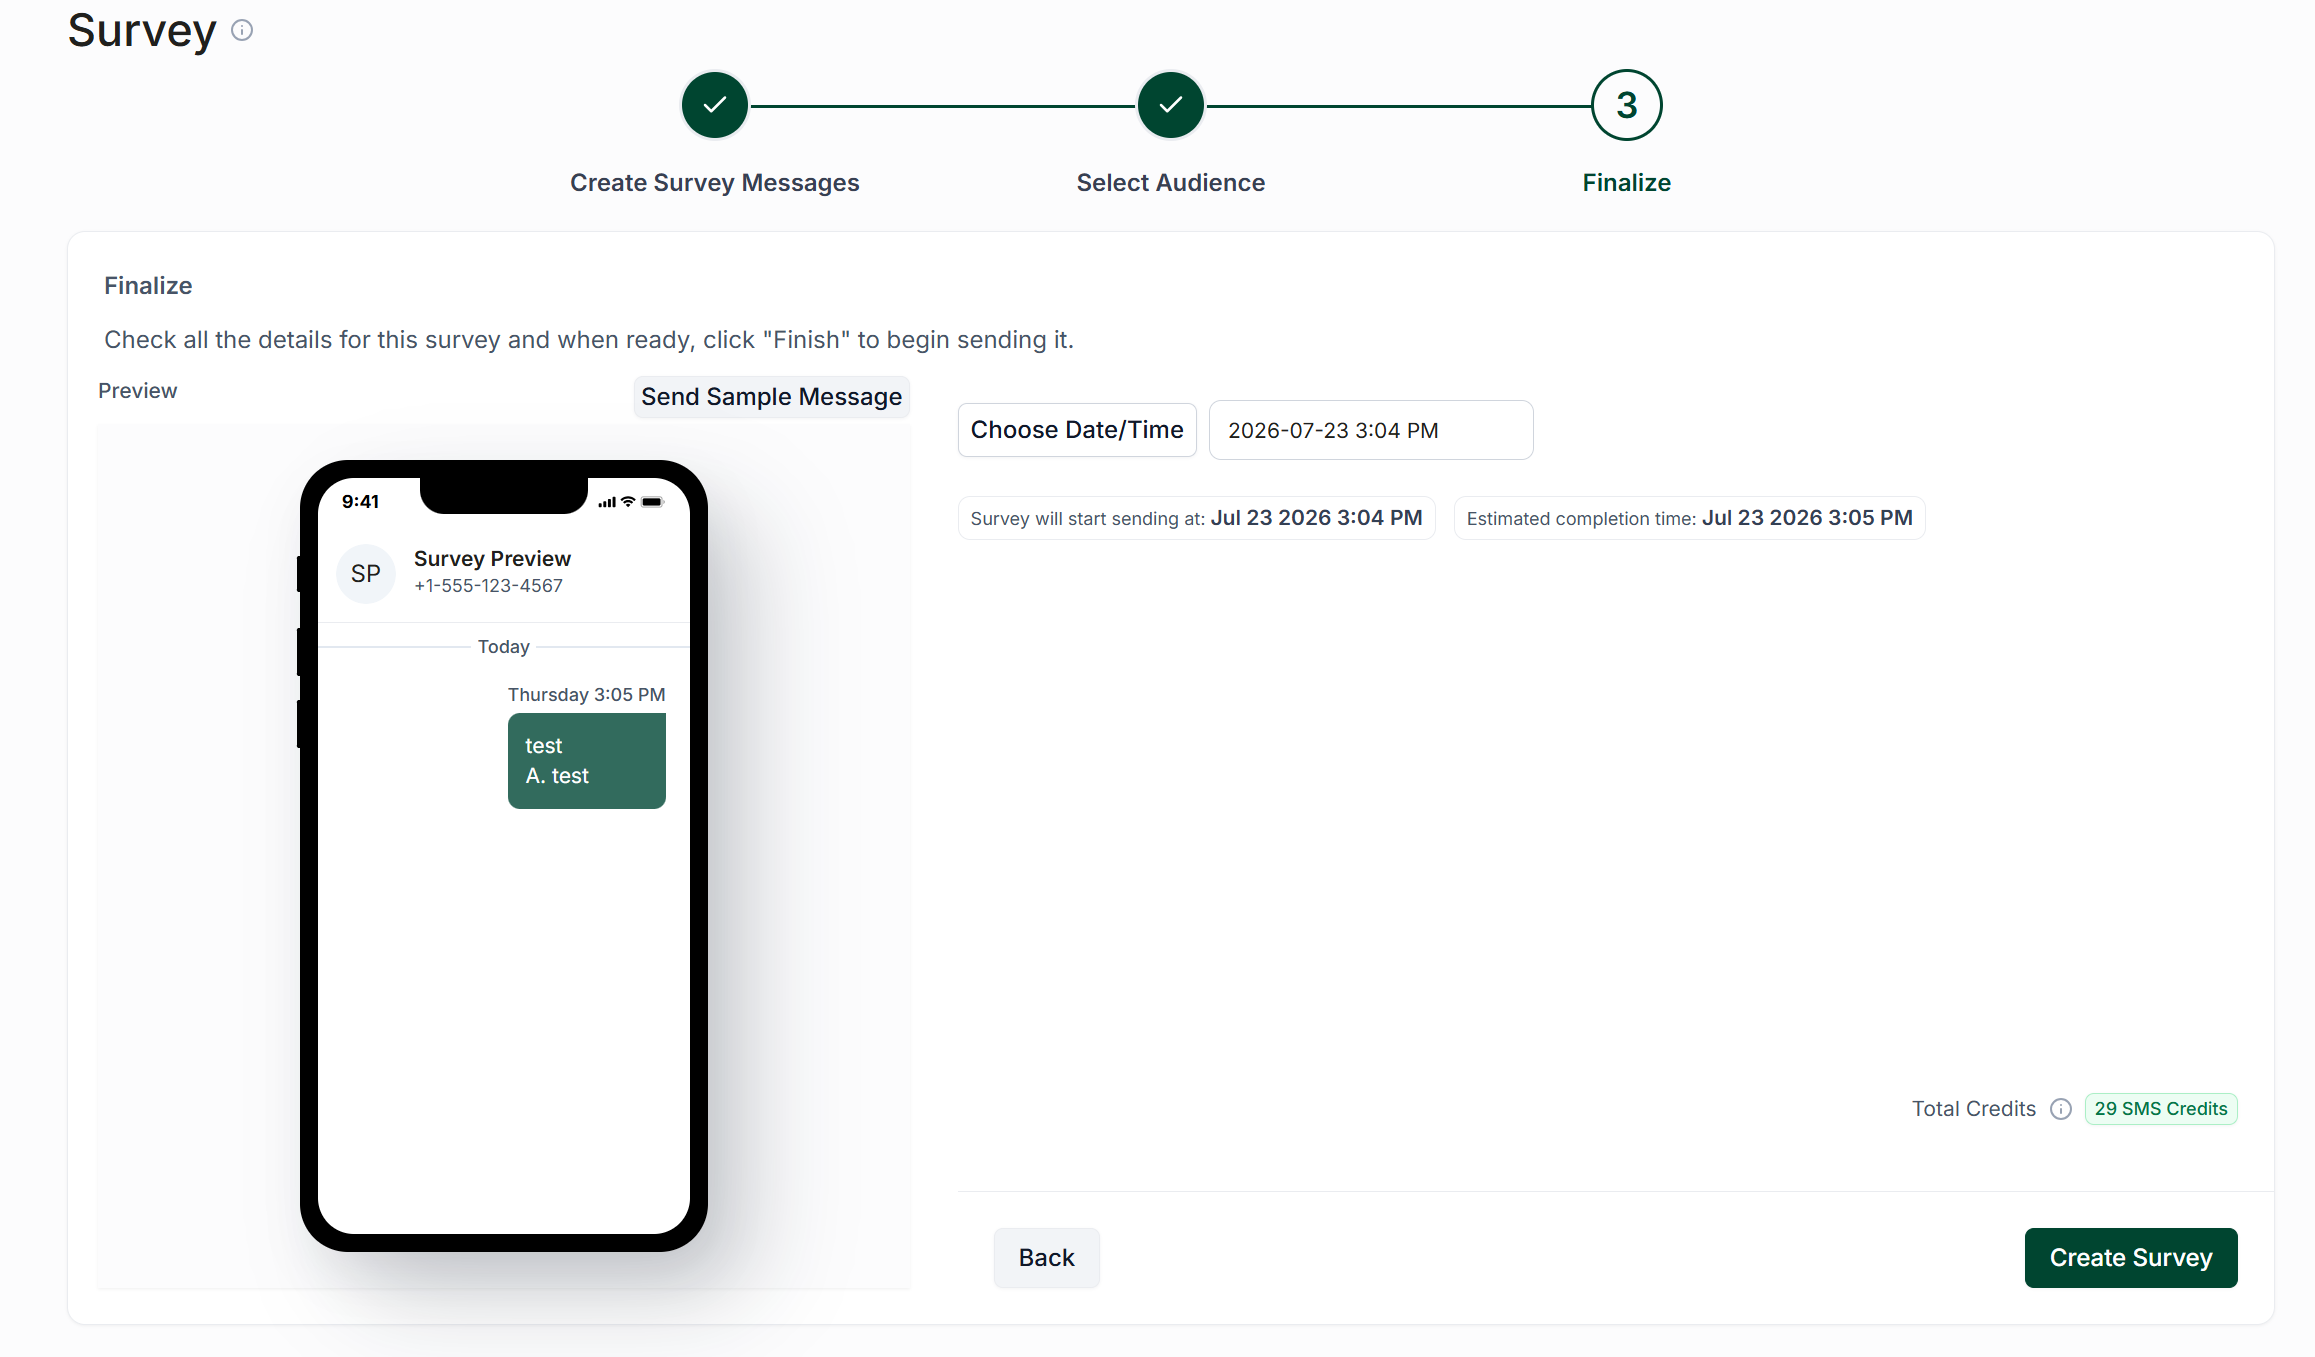
Finally, click "Confirm" to send or schedule your survey.
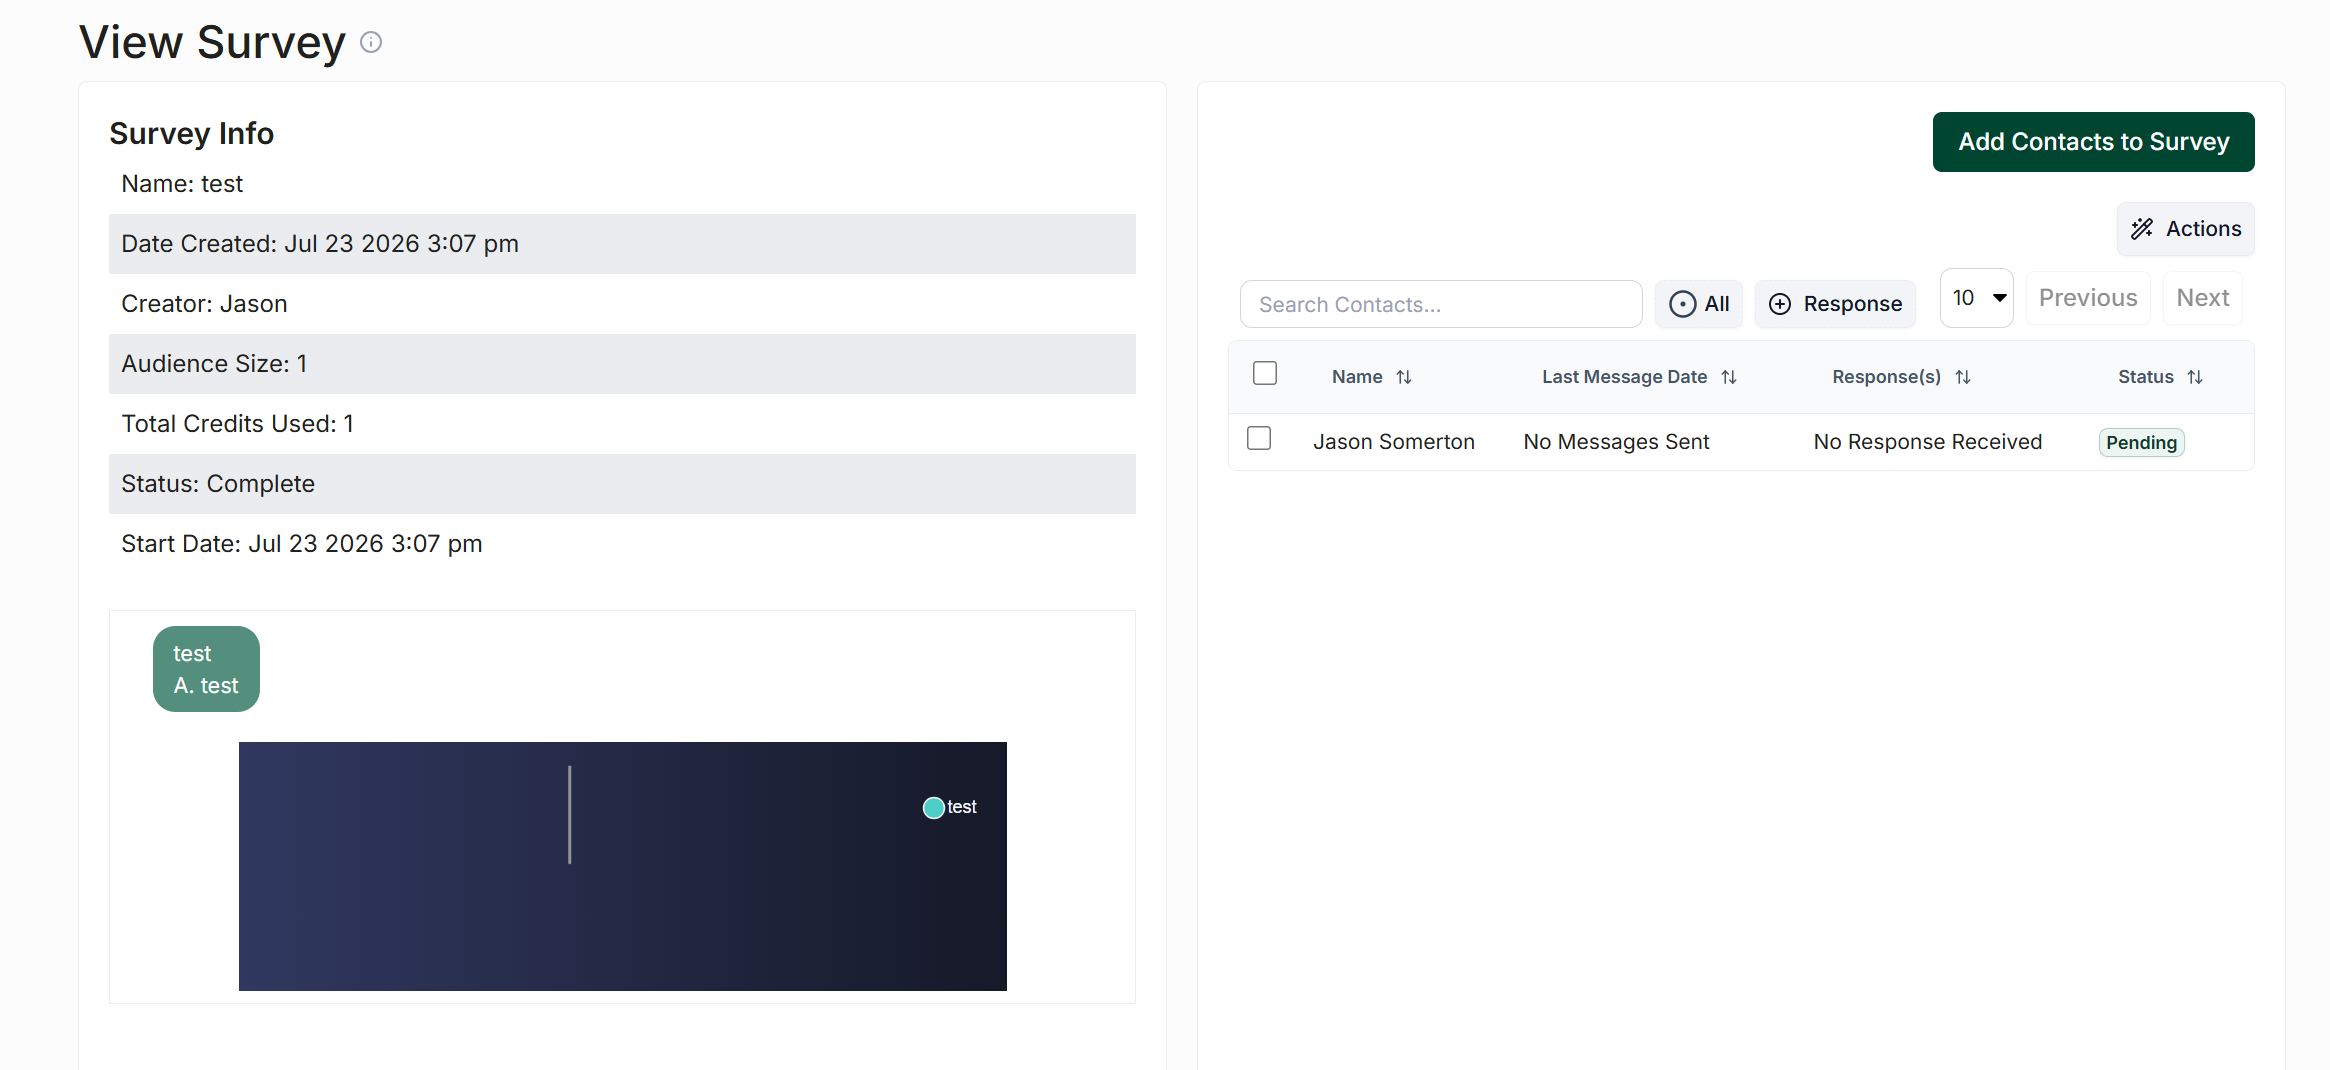
Viewing Survey Results
To view the results of a survey, return to the Survey page from the Workflows menu and select the survey results you wish to analyze from the list.
The "Survey Info" section will display key information about the survey, including its creation date, the creator's name, the number of credits used, and more.
Below this section, the survey questions and results will be presented in a pie chart format for easy visualization.
On the right side of the screen, you can view the contacts who were included in the survey. You can filter these contacts using the "Status" and "Response" buttons located at the top of the table. Additionally, you can select specific contacts and click the "Actions" button in the top right corner to export, tag, or remove them from the survey.