
Appointment Broadcasts
Appointment Broadcasts are an essential tool for communicating with contacts who have scheduled appointments within a specific date and time range. This feature is particularly useful for sending reminders, updates, or day-of instructions to all individuals with appointments on a particular day or over multiple days.
How to Create an Appointment Broadcast
Navigate to the Broadcasts Page
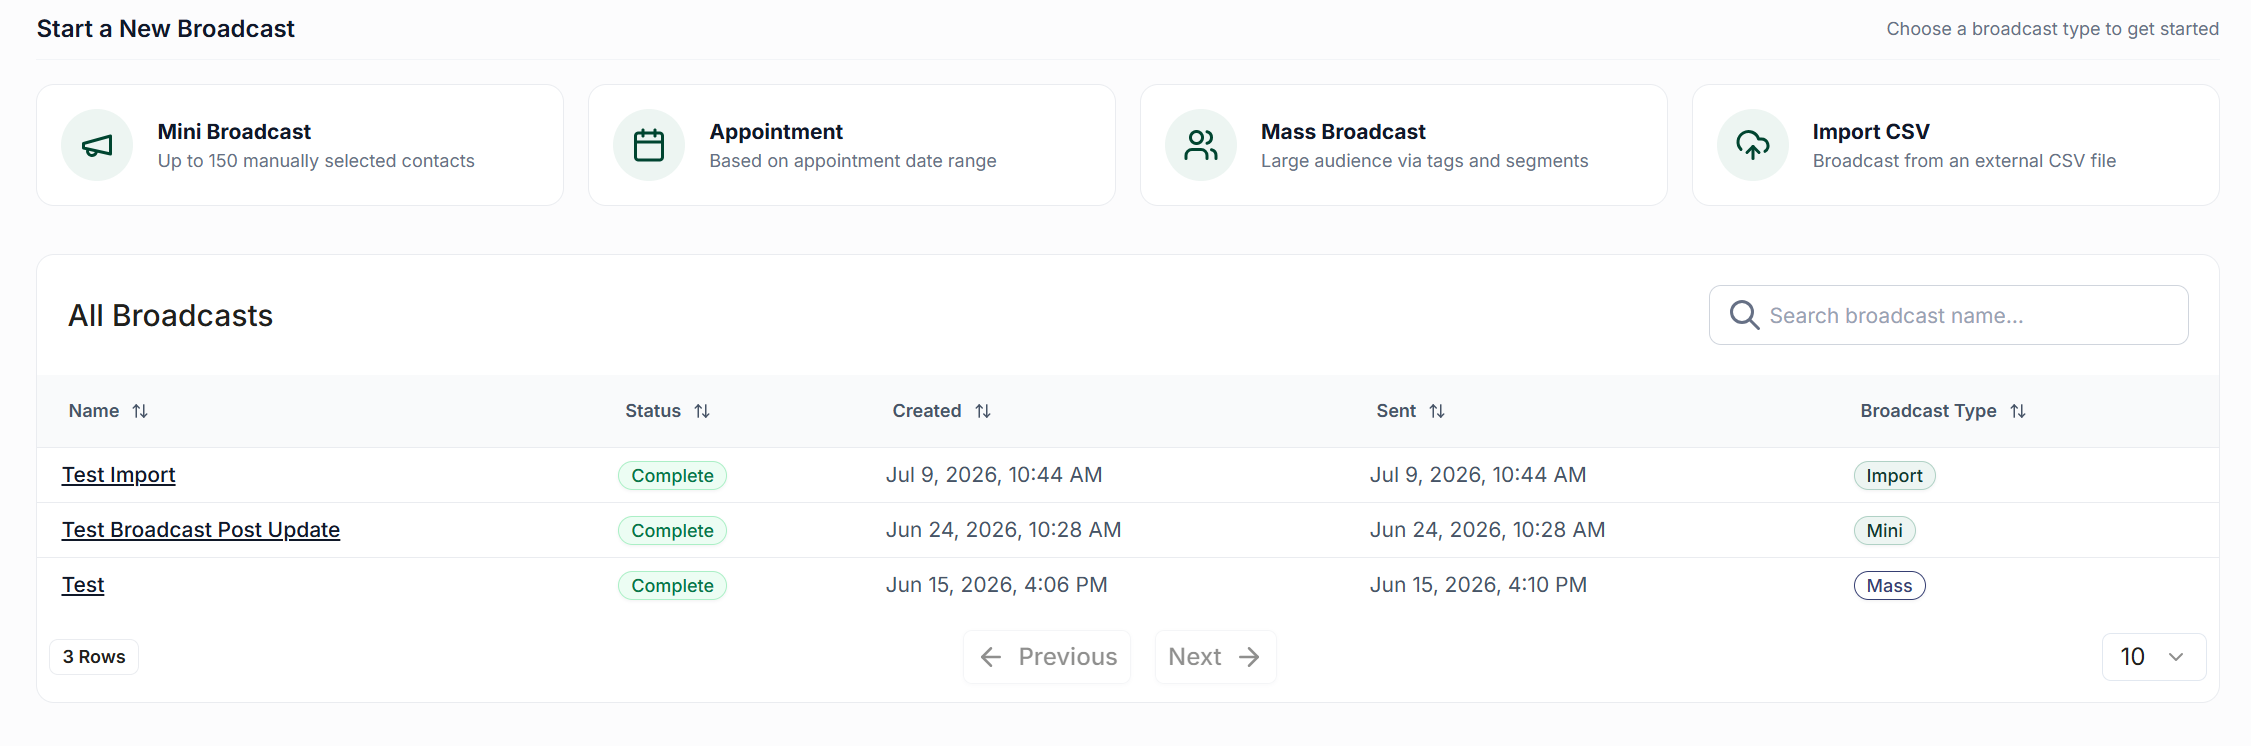
To begin, access the Broadcasts page from the left-hand navigation pane. At the top of the page, click on the option to Create an Appointment Broadcast.
Compose Your Message
Start by assigning a name to your broadcast. This name is for your reference only and will not be visible to recipients. It will appear in the list of past broadcasts, allowing you to review it in the future.
Next, write your message in the provided text box. Utilize the toolbar to add links, insert template fields, include emojis, or use pre-written scripts. On the bottom right of the text box, you will see the number of SMS credits that will be used per contact for the message.
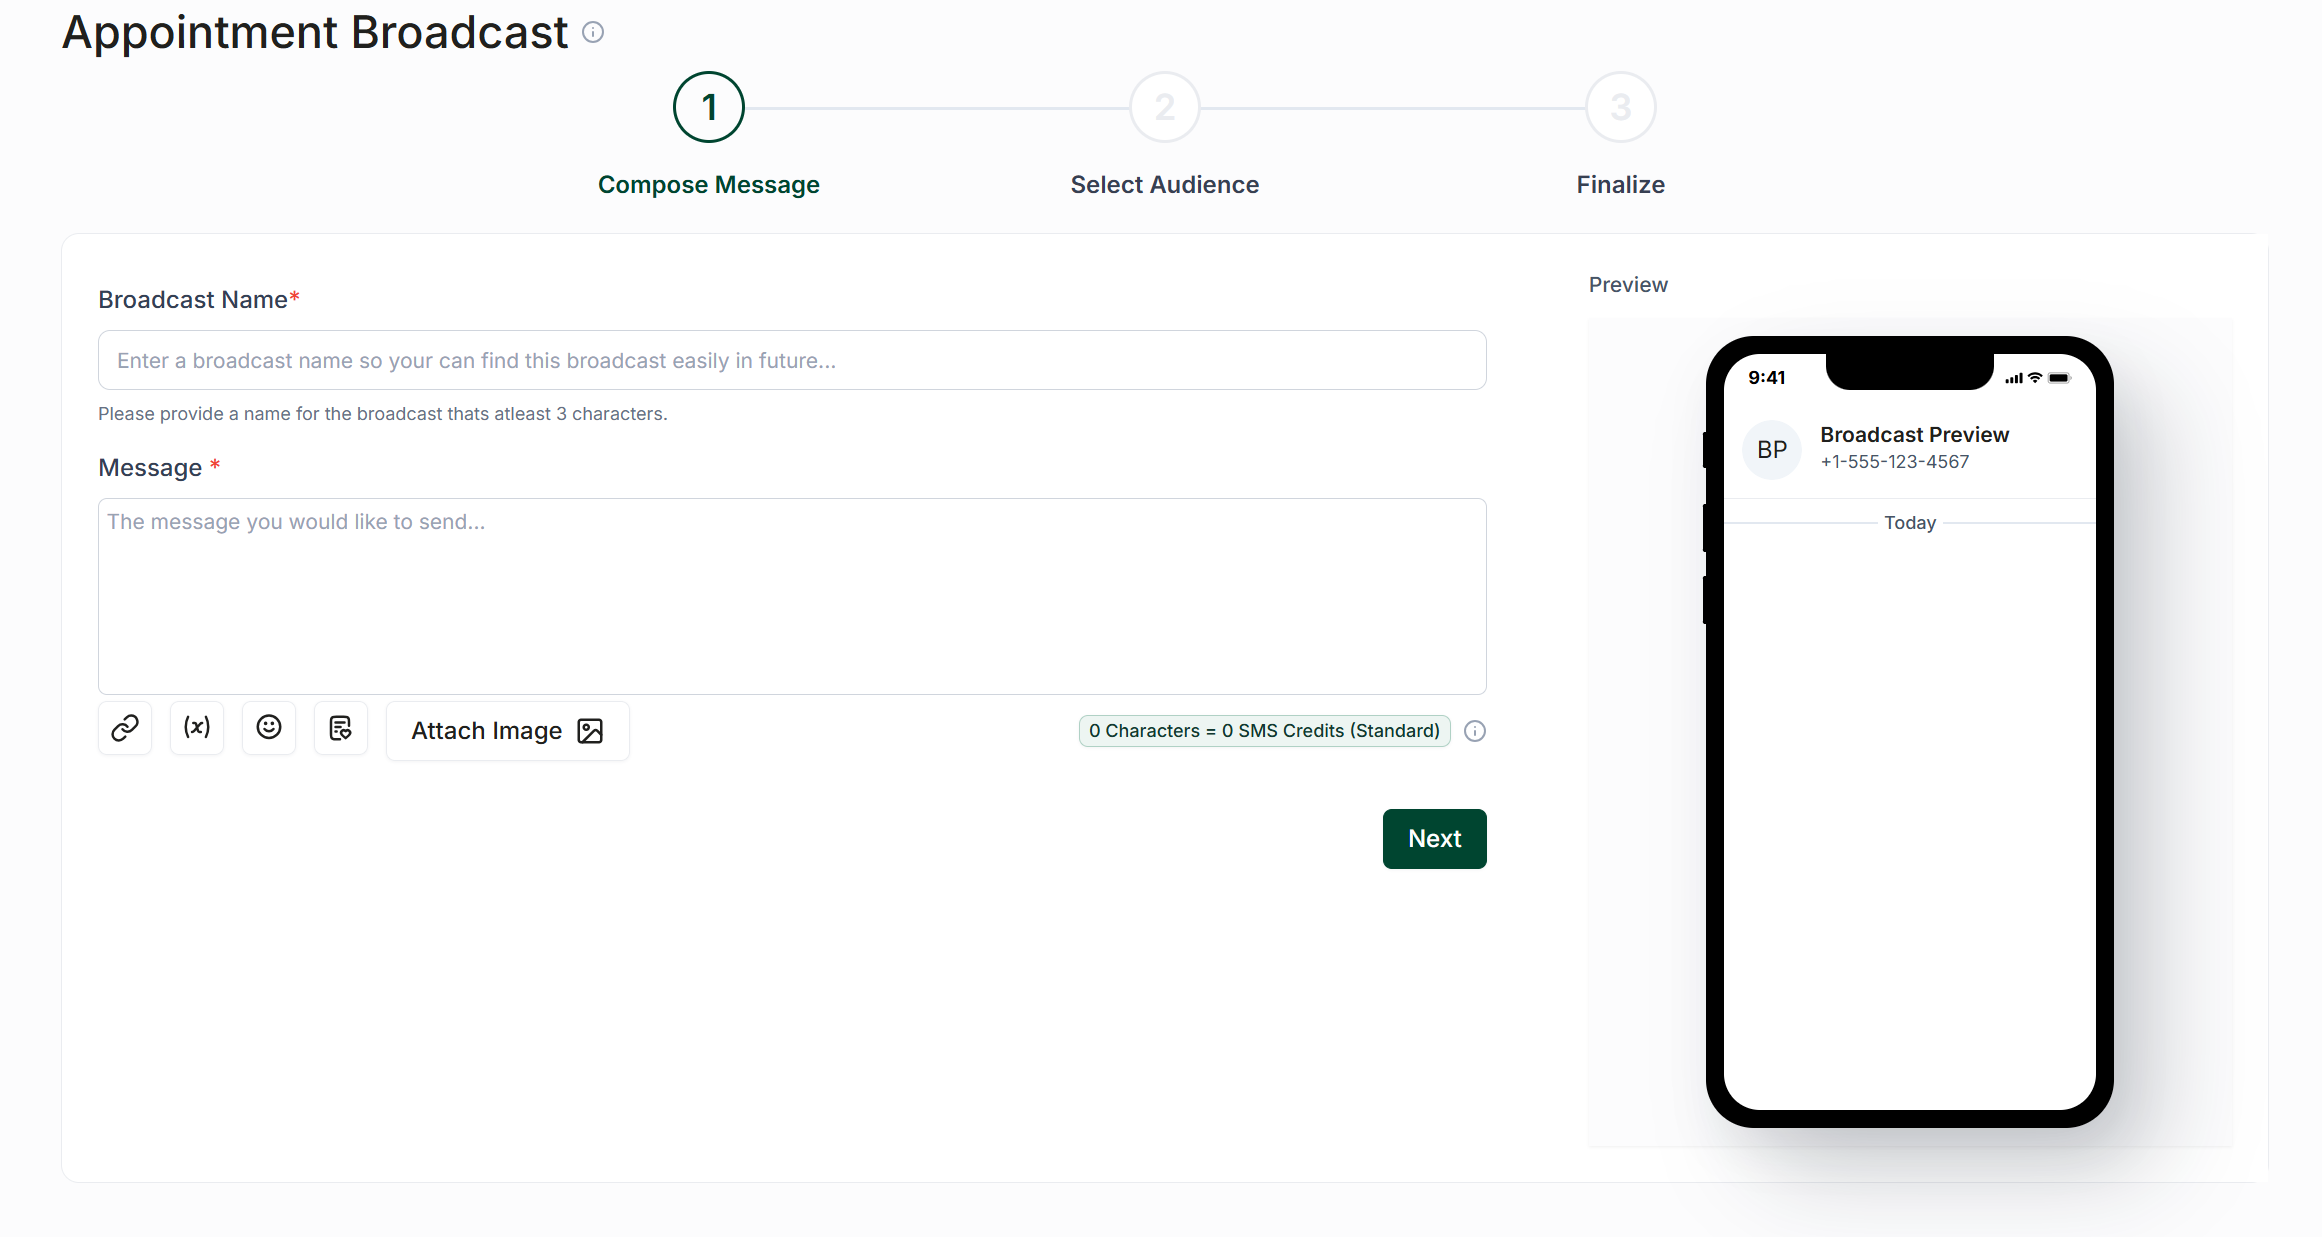
Once your message is ready, click Next to proceed.
Select Your Audience
In this step, you will define your audience based on appointment times. Use the date and time selectors to choose a range. Everyone with an appointment scheduled within that time window will receive the message.
For example:
To message all contacts with appointments on March 24th, 2025, select a range from 12:00 AM to 11:59 PM on that date.
To target afternoon appointments only, select a range from 12:00 PM to 5:00 PM on the same date.
Optionally, you can also select a Service (Appointment Type), Resource (Provider), or Location. If any of these options are selected, the message will only be sent to those who have appointments that match the criteria. For instance, if you select a Resource, such as Dr. House, the messages will only be sent to appointments with Dr. House within the selected time frame.
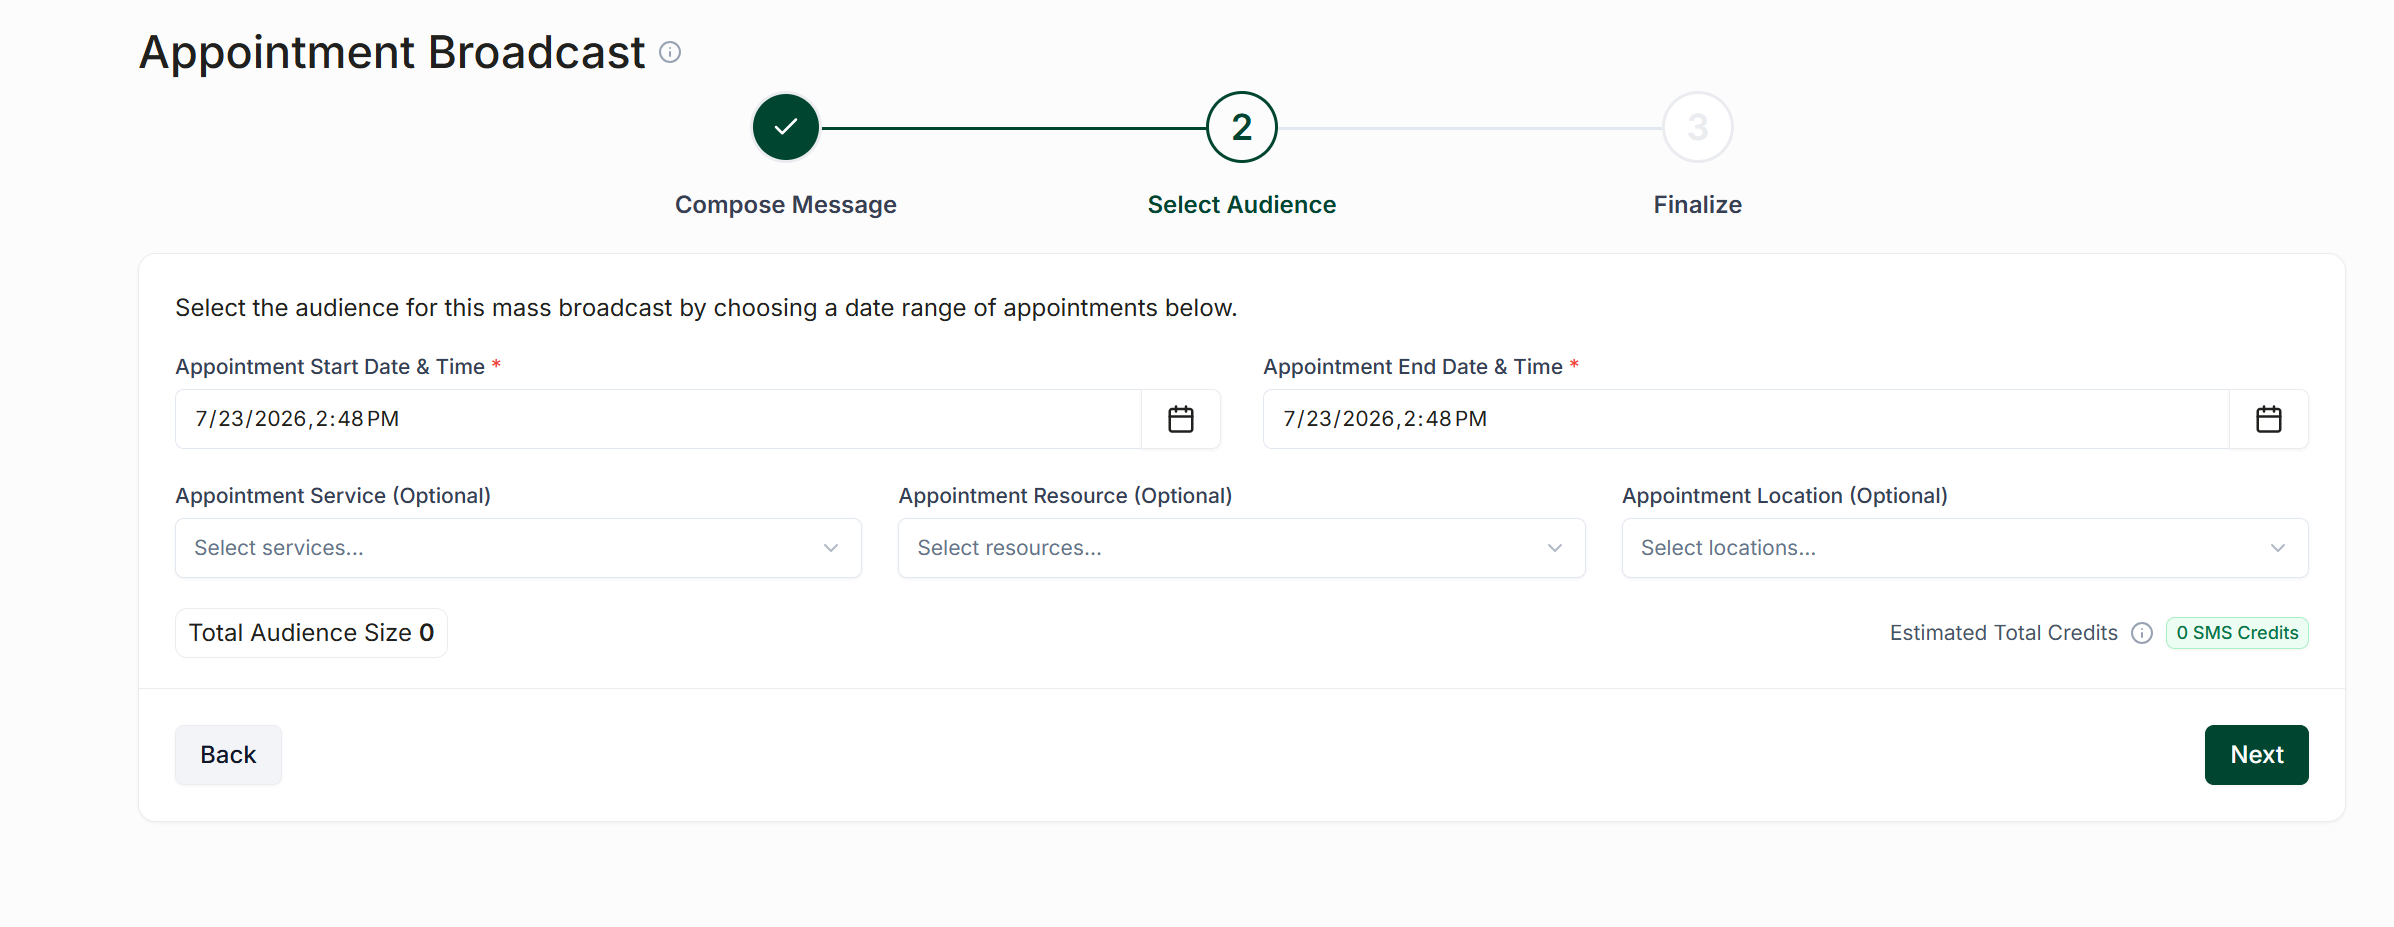
Once you have selected your time range, click Next to continue.
Finalize & Send
In this final step, you will:
Preview your message.
Set the send time (either immediately or schedule it for later).
View the estimated completion time for full delivery.
(Optional) Click Send Sample Message to see how the message will appear on your own device.
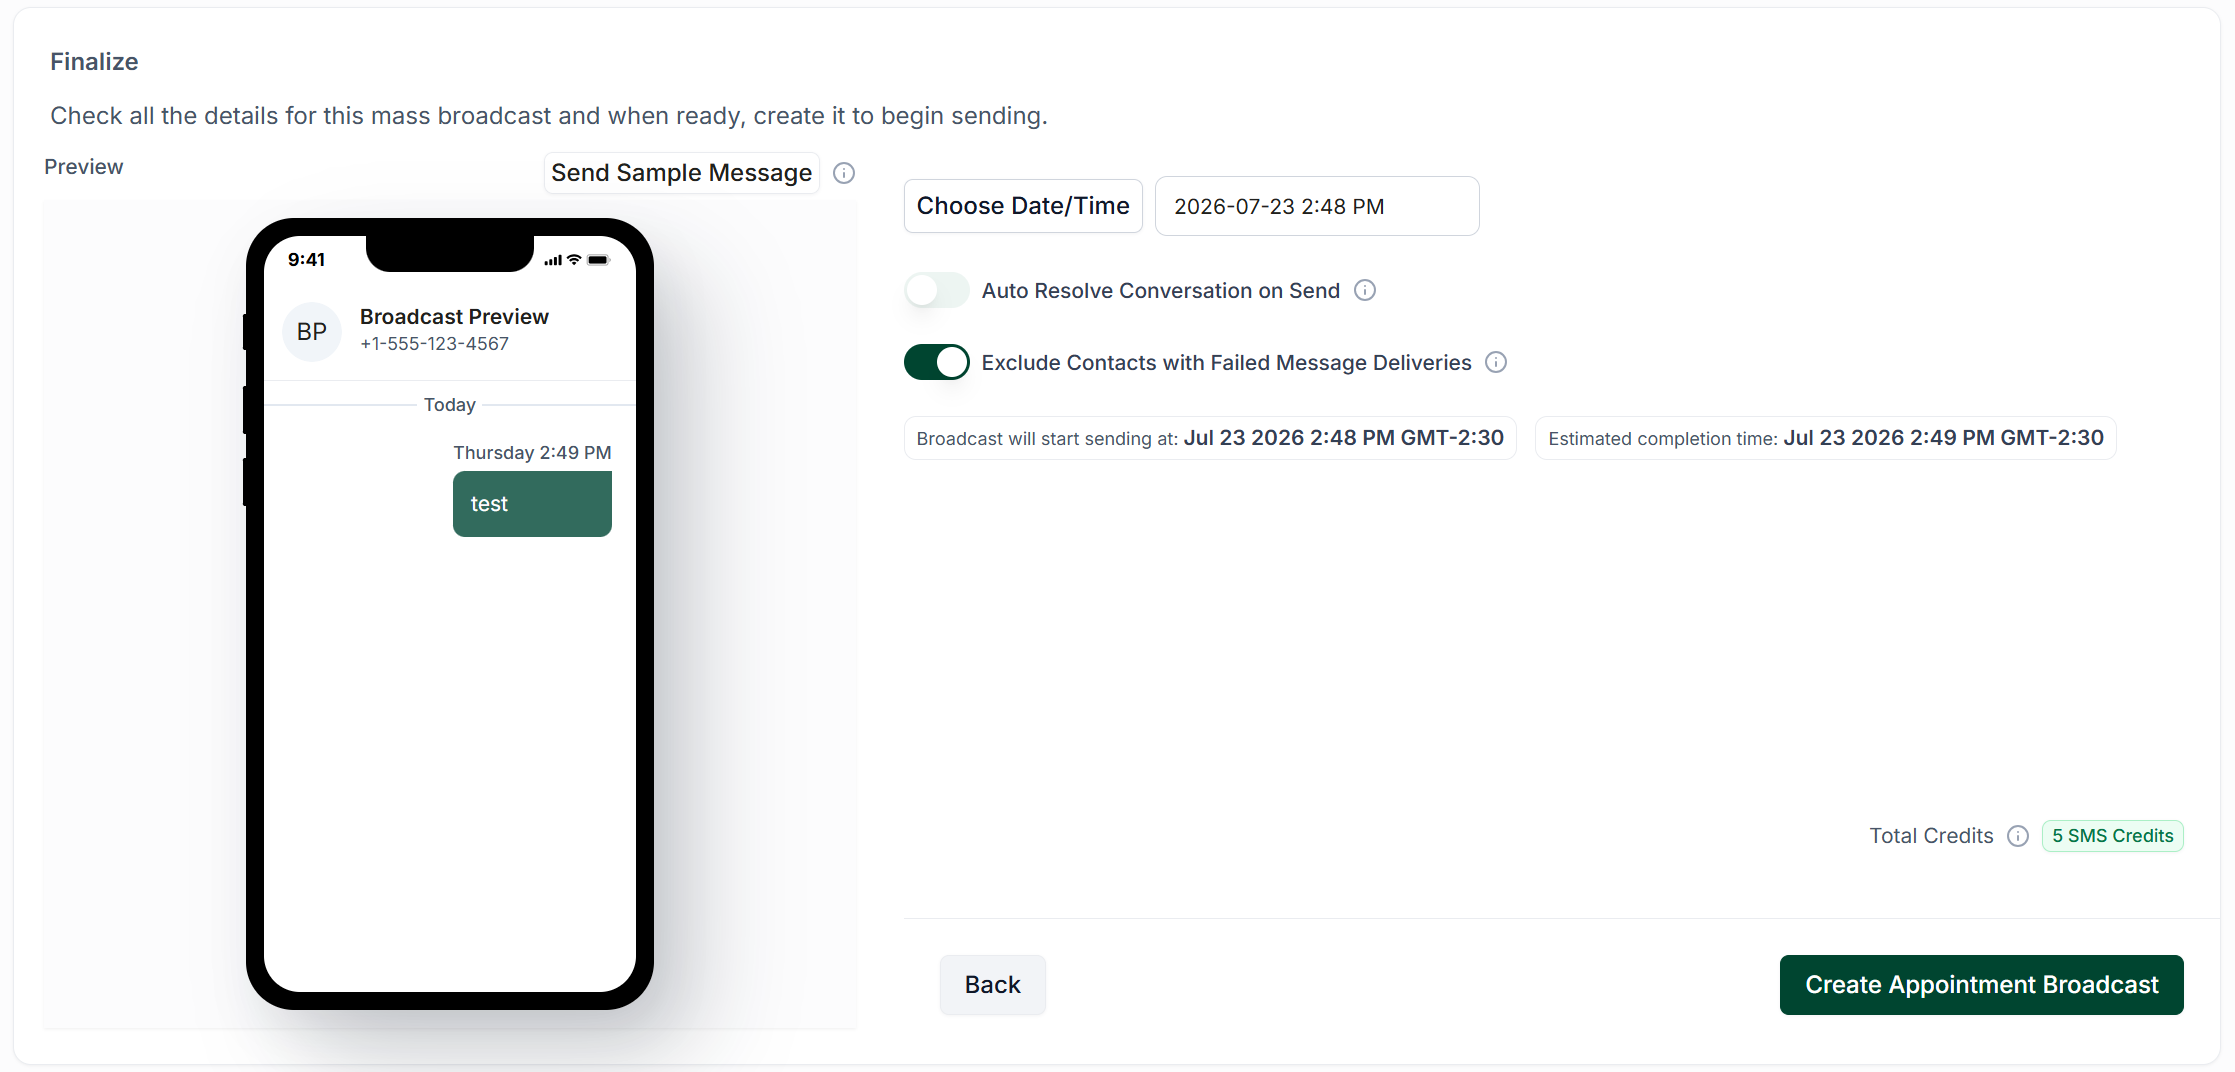
Once everything looks satisfactory, click Next, then Start Broadcast to send or schedule the message.