
Assigning SMS Agents to a Conversation Bot
This document provides a comprehensive guide on how to create and configure an SMS agent centered bot within the Carrick Health platform. By following these steps, you will enable your bot to interact effectively with contacts, enhancing communication and operational efficiency.
Attaching Your SMS Agent to a Bot
Once you have created and configured your SMS agent, the next step is to attach it to a bot. This is essential for the bot to interact with contacts effectively.
Creating an Agent Centered Bot
To create a new bot, follow these steps:
In the left-hand sidebar, navigate to Workflows.
Scroll to the bottom of the page, click on Bots, and select New Bot.
Enter a name for your bot, provide an optional description of its function, and set the bot type to Incoming.
Setting Up Your Bot
Once your bot is created, you need to set it up to include a step for greeting and capturing new contact information. This can be done as follows:
Add a step for greeting and capturing new contact information, as outlined in the Conversation Bot Steps.
Create a new step below the greeting/capture step where you will assign the agent to the contact.
Configuring Actions and Conditions
In this step, you will add conditions and actions to enhance the bot's functionality:
Add a Contact Type condition to this step and set it to All.
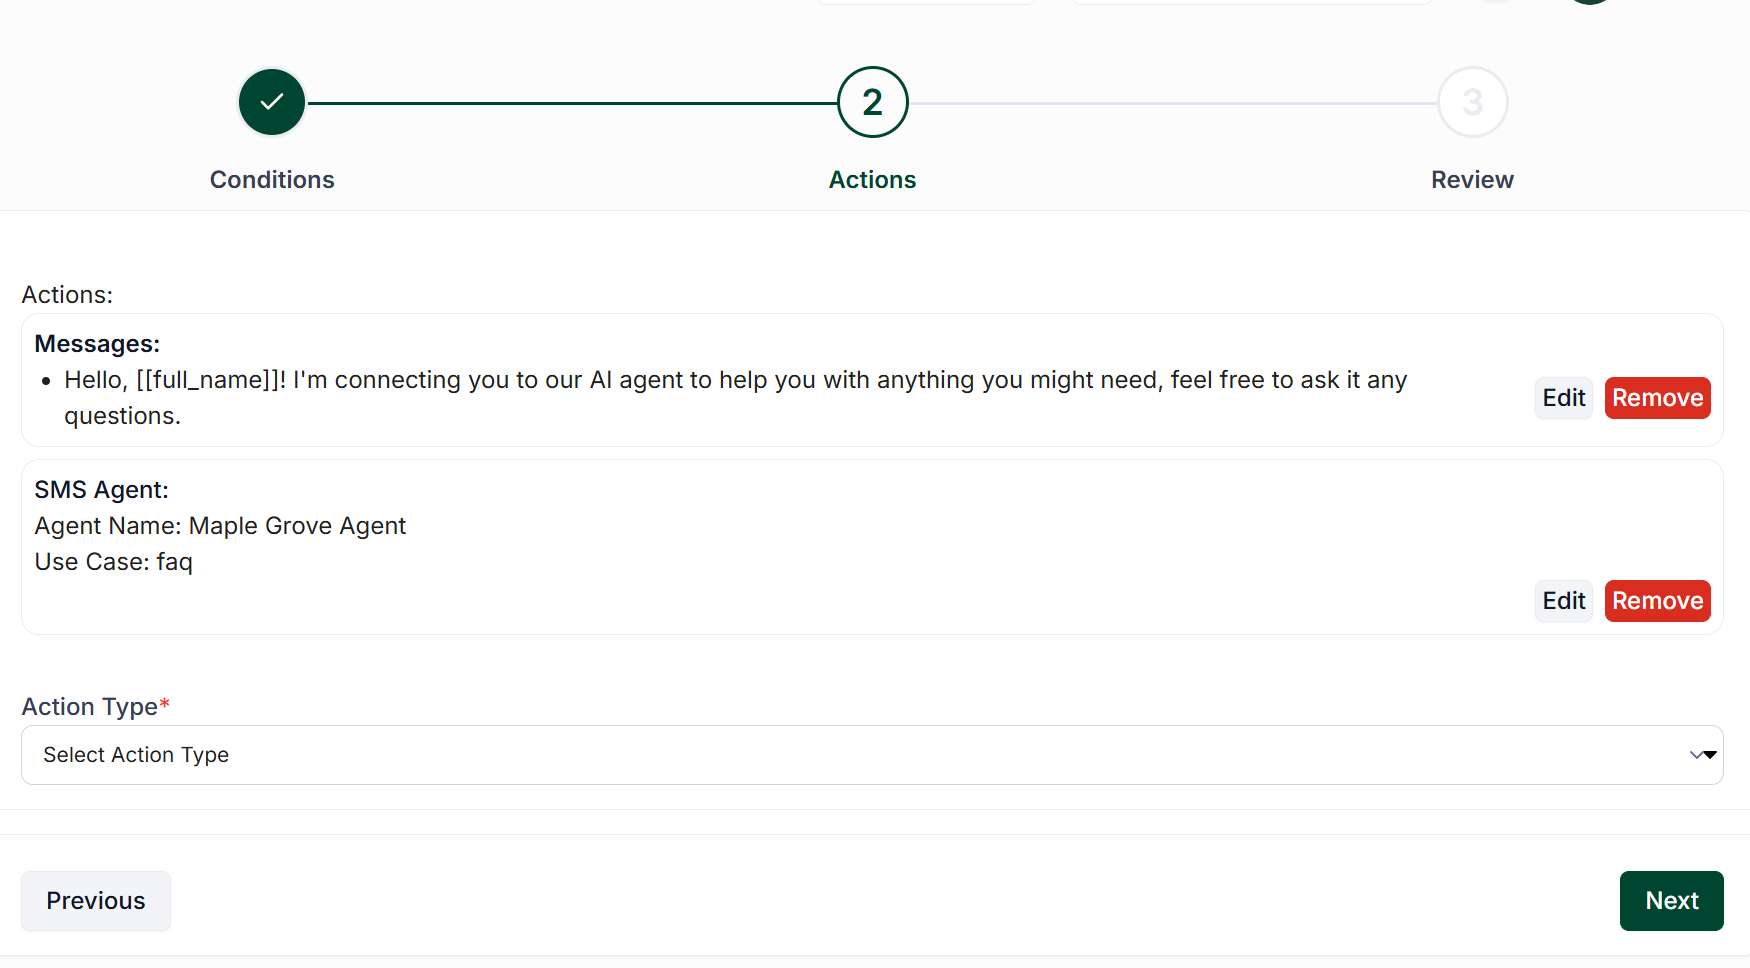
Once on the Actions screen, add a Message action that acknowledges the contact's input from the previous step and informs them that they are now connected to your AI agent.
Add a new action for FAQ Agent and select your configured agent.
Finalizing Your Bot
After configuring the actions and conditions, proceed to the Review screen:
Give the step a name and complete the creation process.
Best Practices
To adhere to best practices and minimize the need for contacts to confirm their identity multiple times, consider adding an alternate step to your bot. This step should greet existing contacts and assign them an AI agent.
Activating Your Bot
Once you have completed the setup, return to the bot screen and activate your bot. Any incoming messages will now be processed through your agent, which will respond to inquiries and assist in booking appointments, thereby alleviating significant workloads from your staff.