
Assigning Voice Agents To An Inbound Call Policy
This document provides a step-by-step guide on how to assign a voice agent as the entry point for inbound calling after it has been created and configured. Following these instructions will ensure that your users can effectively receive and manage inbound calls.
Assigning a Voice Agent for Inbound Calls
Once a voice agent has been created and configured, the final step is to assign it as the entry point for inbound calling.
Navigating to Phone Configuration
In the left-hand sidebar, navigate to Workflows. Scroll to the bottom of the page and select Phone Configuration. This action will initially bring you to the Voicemail & Forwarding tab. From here, proceed to the Routing Rules tab.
Enabling Inbound Call Policy
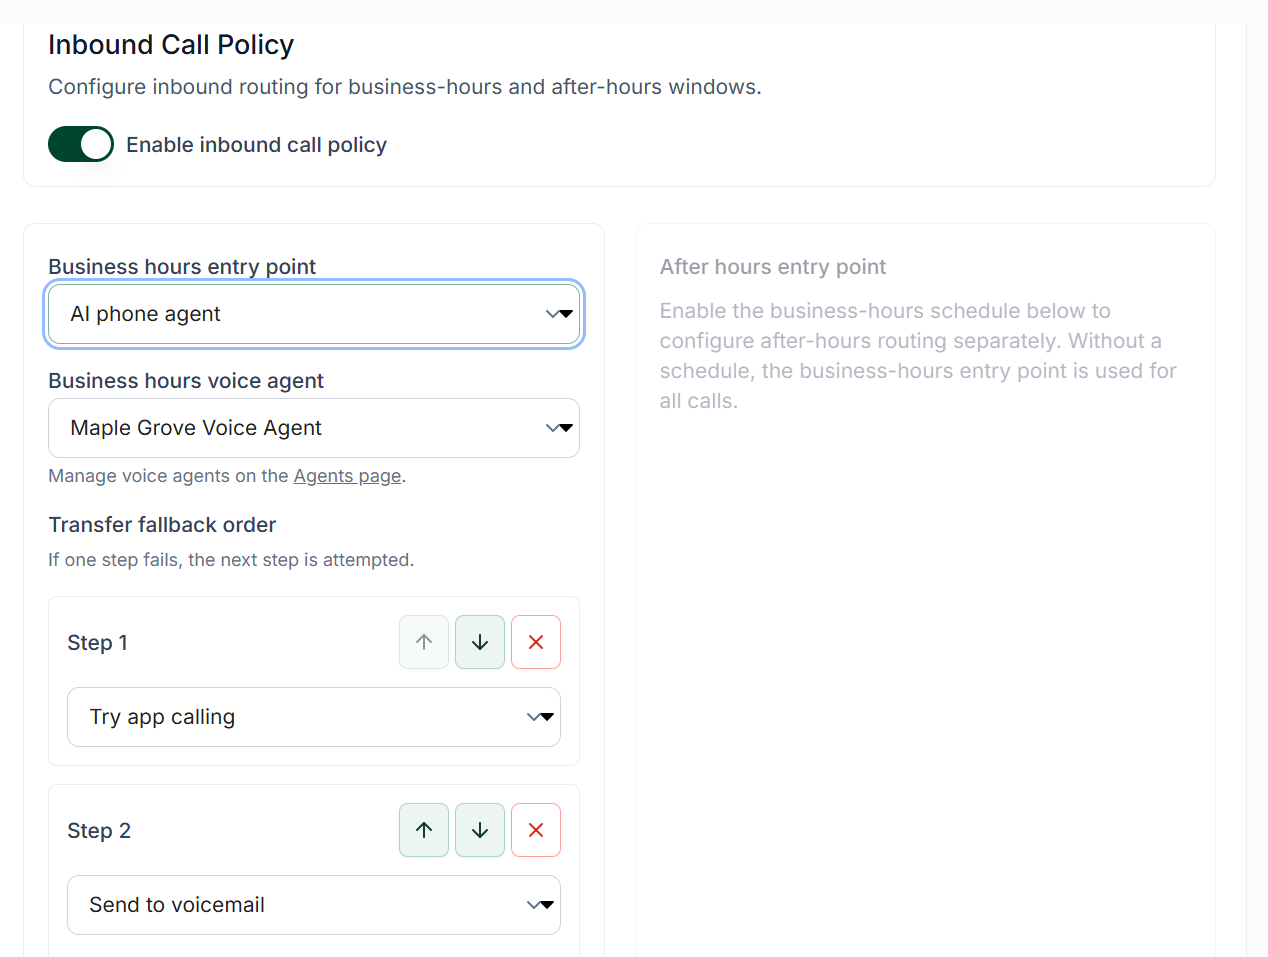
Toggle on Enable Inbound Call Policy. This setting allows your users to receive and answer inbound calls. For our purposes, we will change the Business Hours Entry Point to AI Phone Agent.
Selecting the Configured Agent
Select your configured agent and determine your Transfer Fallback Order. This order dictates how the agent will transfer calls. Unless you prefer calls to be transferred to a specific person, it is recommended to select the following options:
App Calling as the first fallback
Send To Voicemail as the second fallback
This configuration will ring all users currently connected and transfer the call to the first user to answer. If no one answers, the call will be sent to voicemail.
Finalizing the Setup
Your agent is now ready to go. All calls will be recorded, transcribed, and summarized in the contacts' regular text conversation.