
Importing Appointments
This document provides a comprehensive guide on how to import existing appointments into the Carrick Health system. Follow the steps outlined below to ensure a smooth and error-free import process.
Step 1: Prepare Your Appointment Files
Before you begin the import process, ensure that your appointment files are formatted correctly. Supported formats include:
CSV
XLSX
XLS
Step 2: Navigate to the Import Appointments Section
In the left-hand sidebar, navigate to the "Appointments" page. Once there, select the "Import Appointments" option located in the top left corner of the screen.

Step 3: Upload Your Appointment Files
Click on the button in the center of the screen to browse your files. Locate and select the appointment file you wish to import.
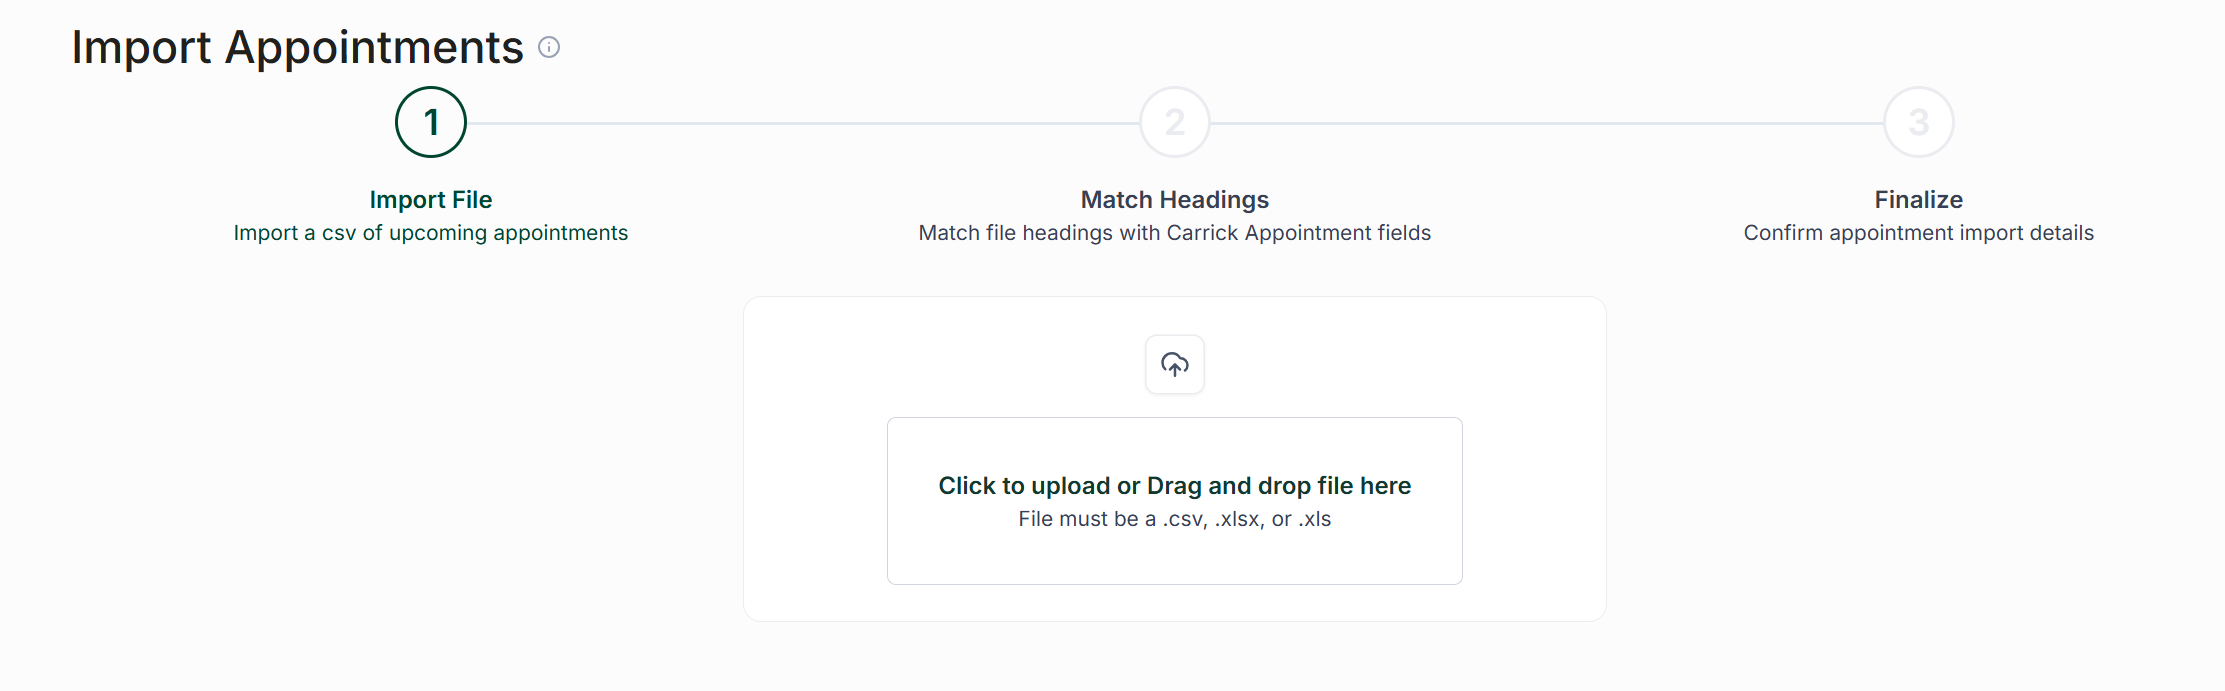
Step 4: Match Fields to Columns
After uploading your appointments, you may encounter an error due to unmatched fields. To resolve this:
Hover over "Select a Field" on each column heading.
Assign the fields to match the corresponding data in your file.
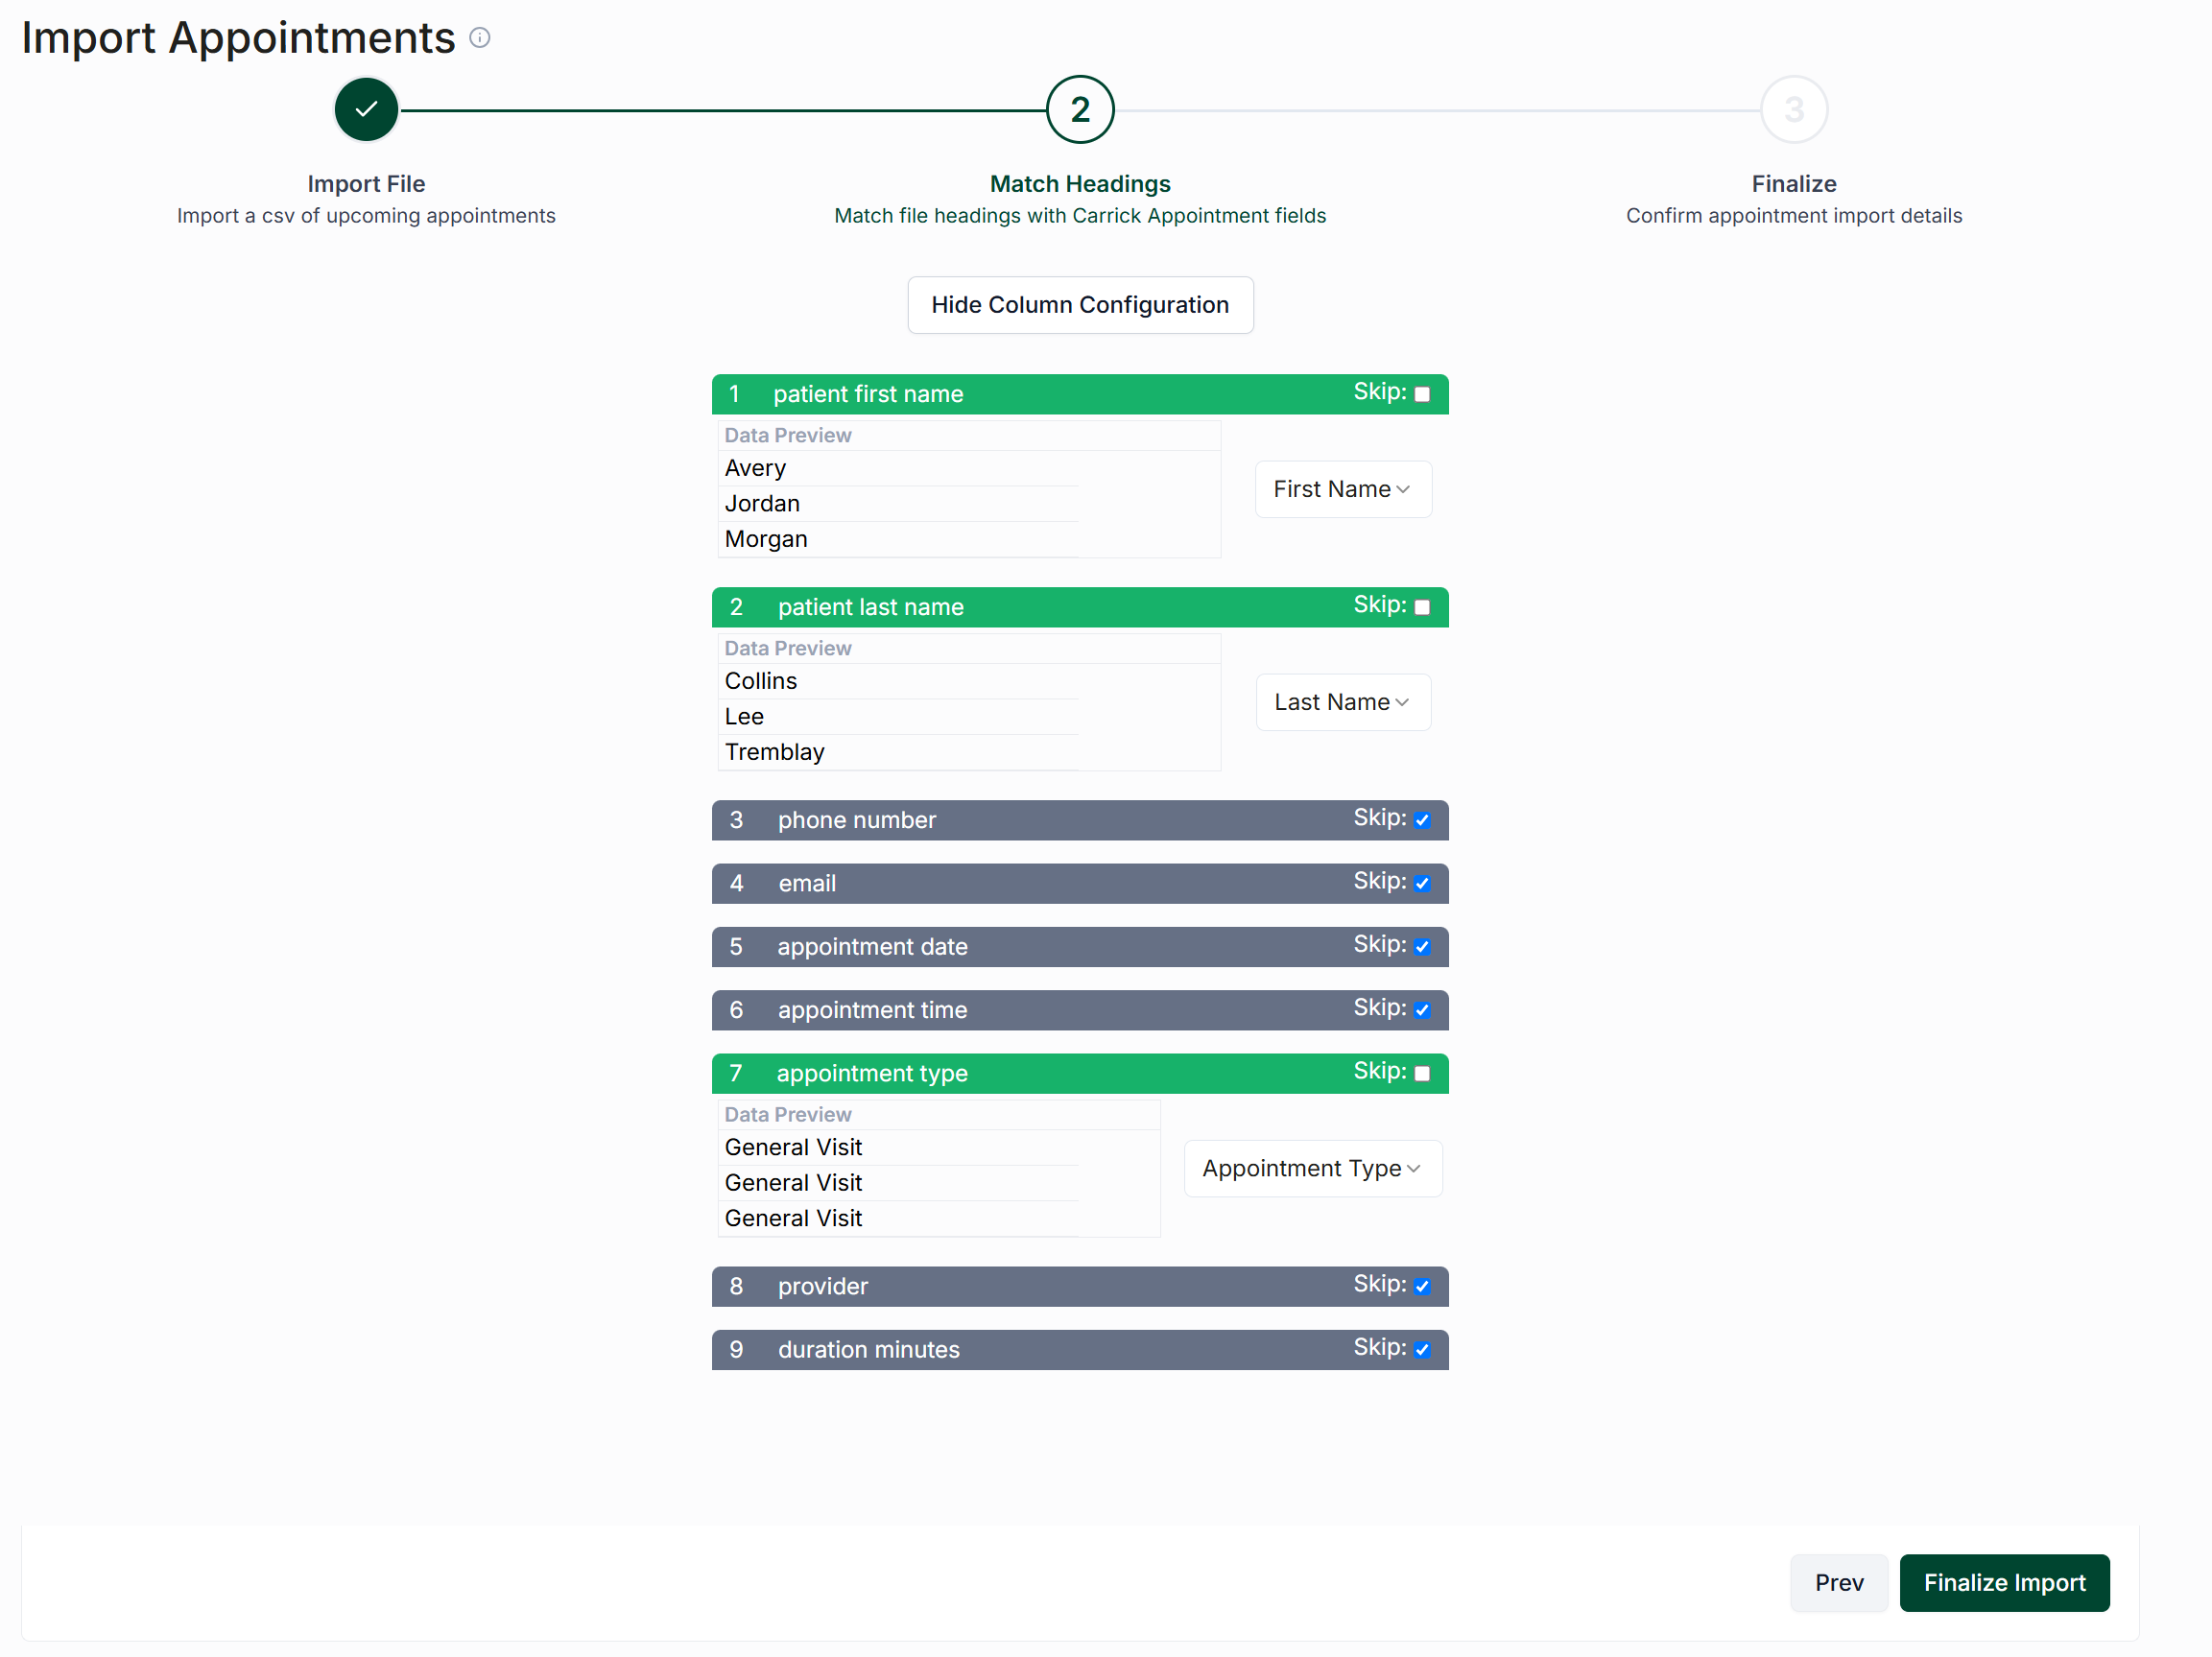
Step 5: Finalize the Import
Once all fields have been matched correctly, click on "Finalize Import" to complete the process.
Alternative Method: Configure Appointment Settings
This section will show you how to configure your appointment importer to automatically recognize your specific fields when importing appointments. This will save time by removing the requirement for you to manually match column heading when importing appointments. Please follow these steps:
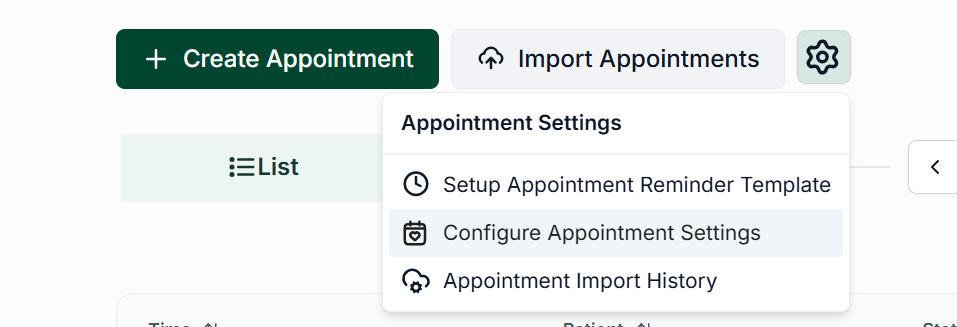
From the initial appointments screen, click the settings icon next to the import button.
Select "Configure Appointment Settings."
Enable Import Template
On the appointment configuration screen, navigate to the "Import Configurations" tab and enable the "Import Template" option.
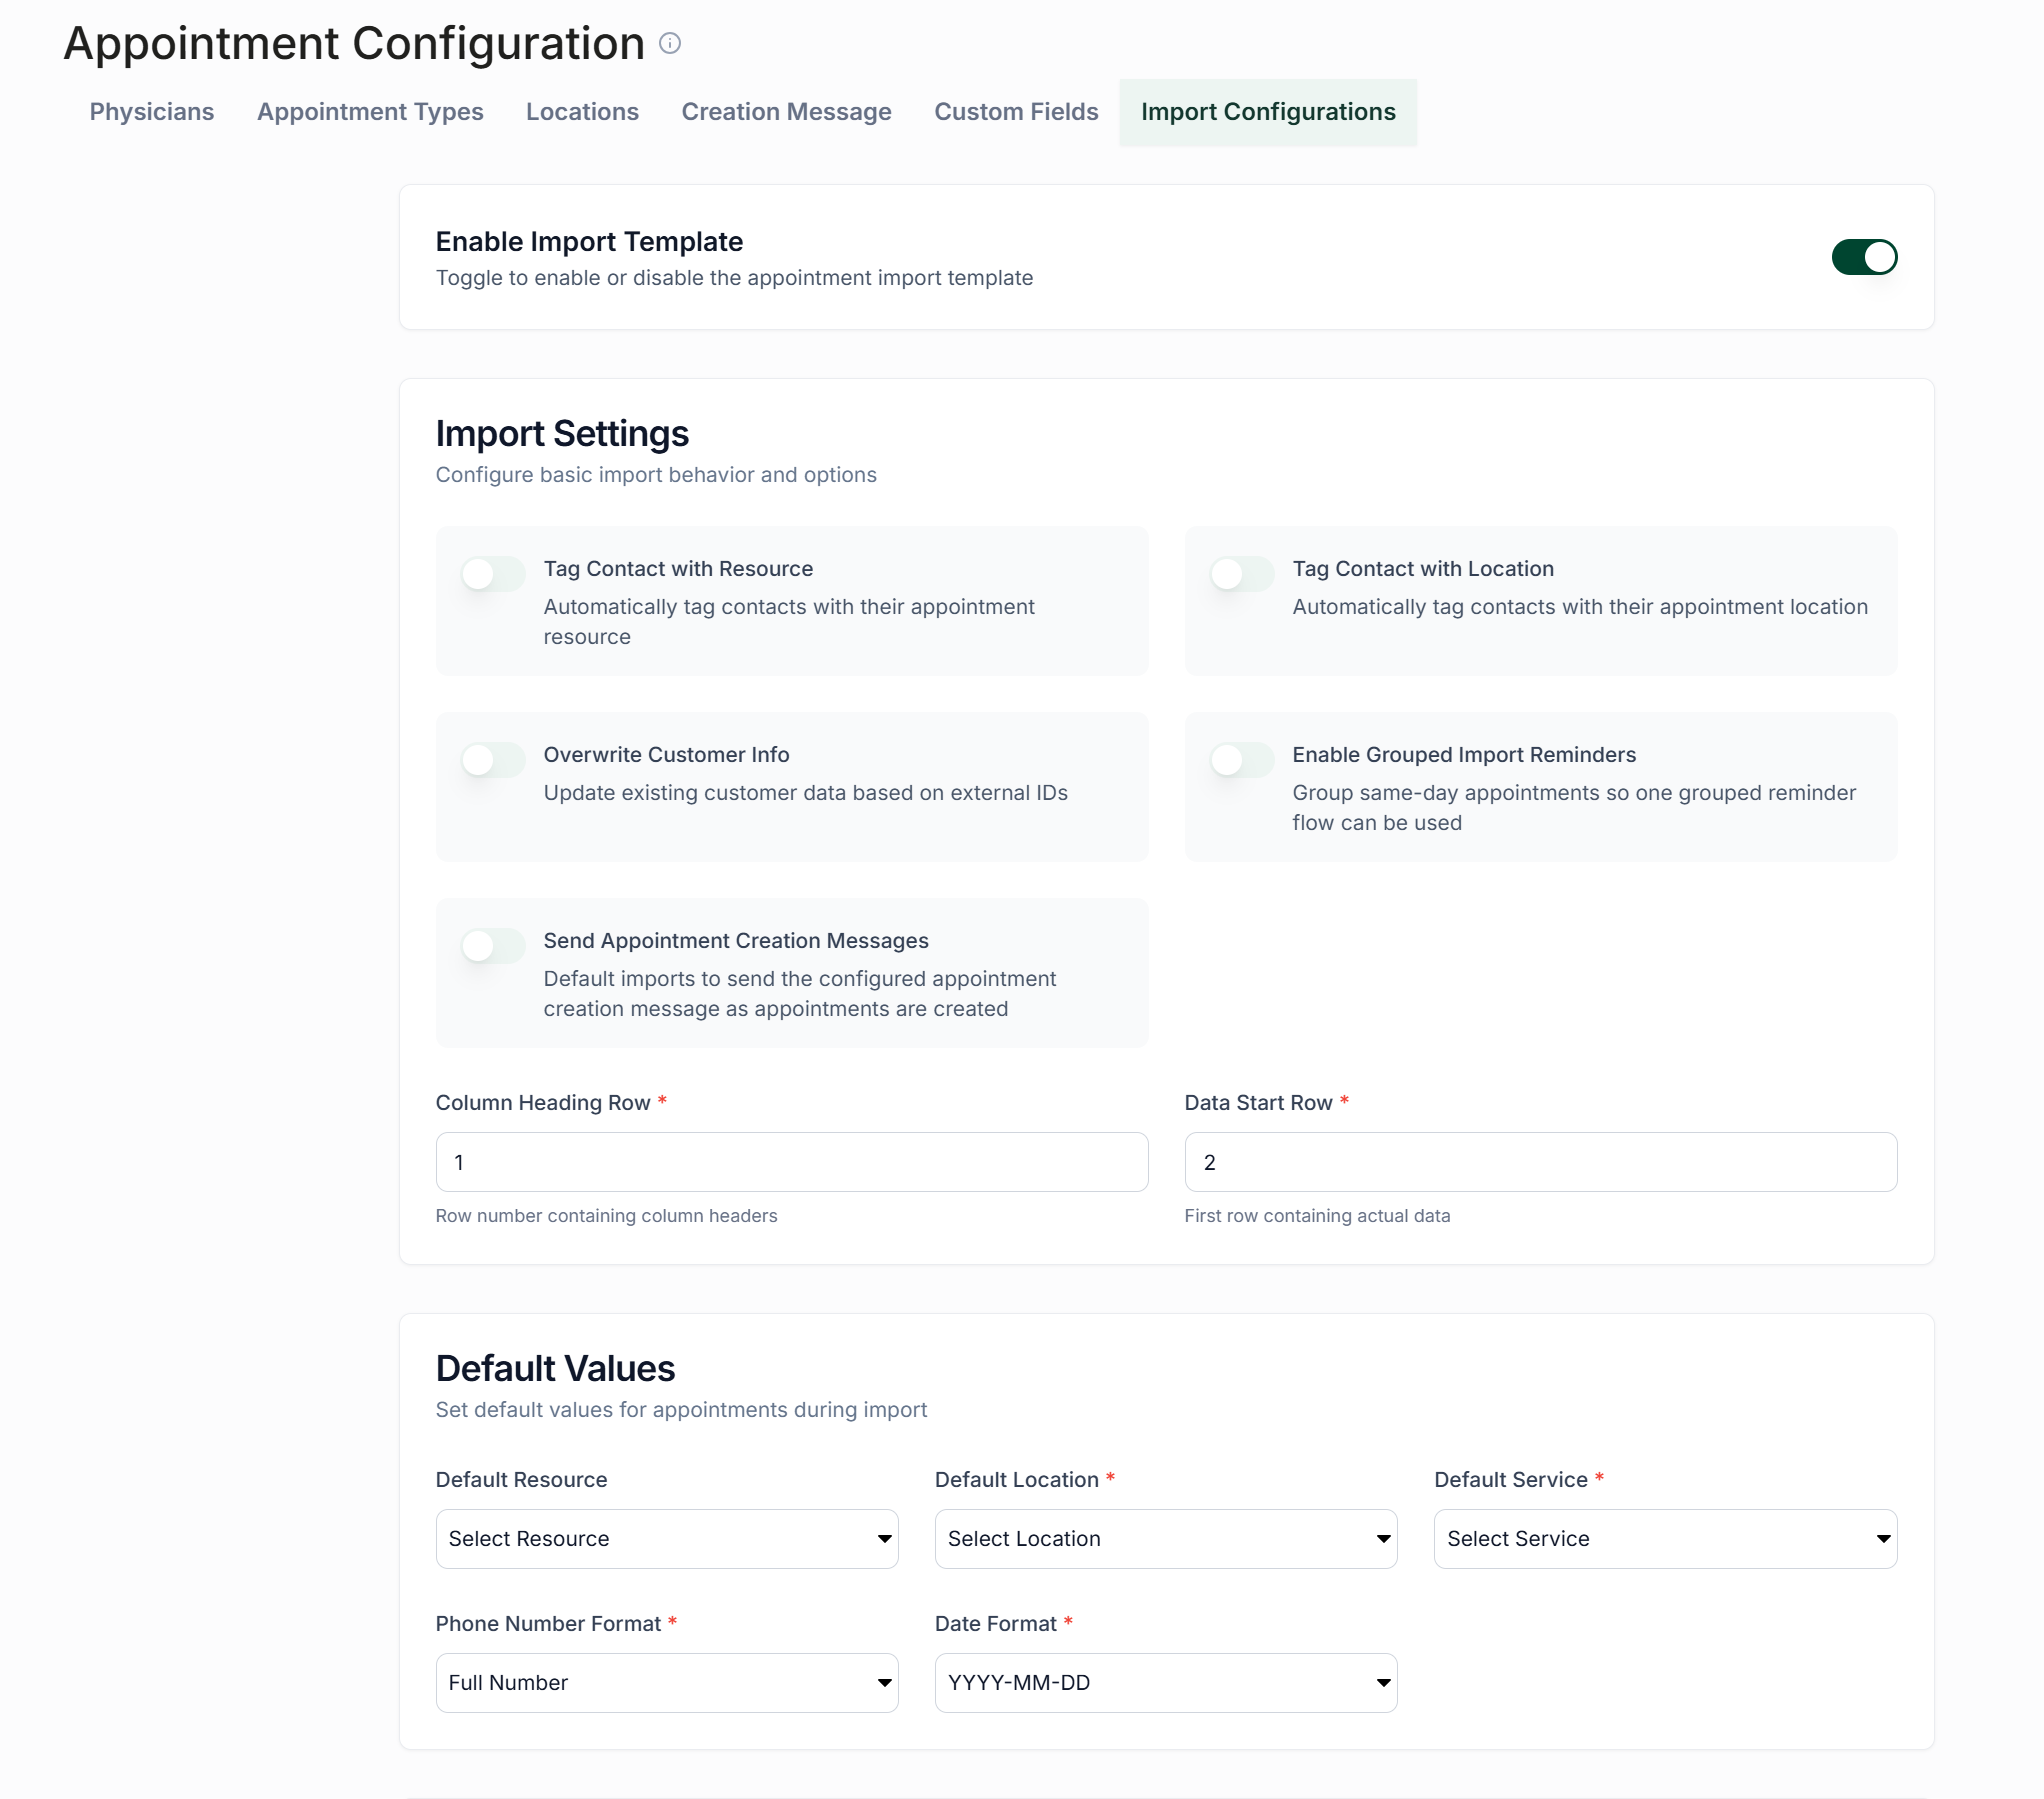
Set Field Mappings
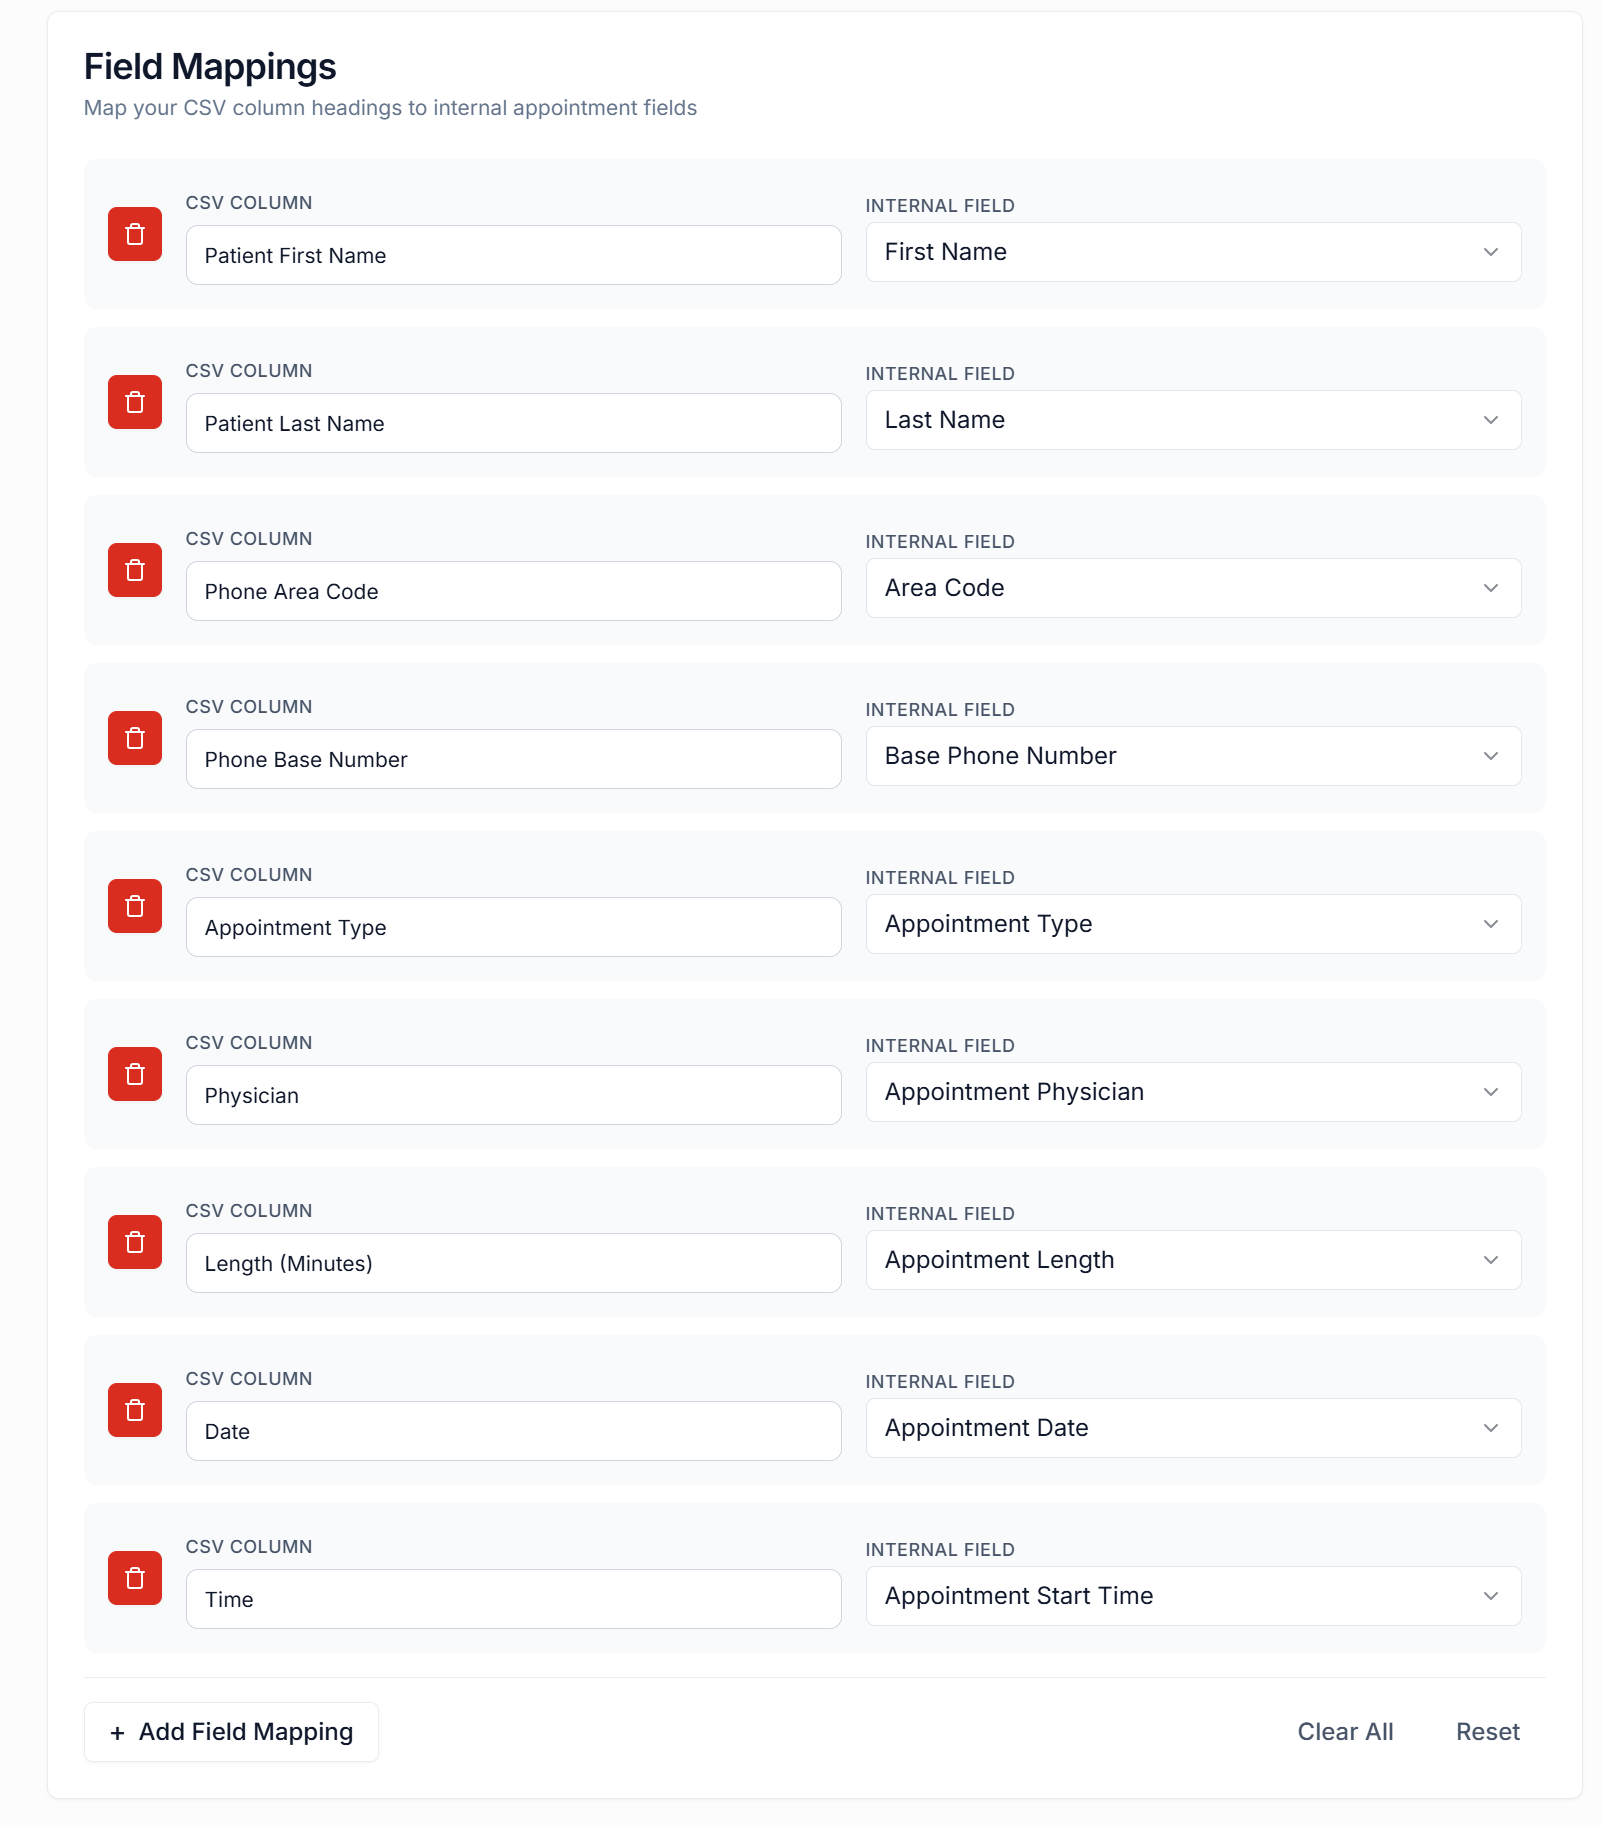
Scroll down to the "Field Mappings" section:
Enter the names of your columns in the left-hand input field.
Use the dropdown on the right side to select the corresponding Carrick internal fields that match your columns.
After completing the mappings, scroll down and click "Save."
Select Date Format and Reminder Type
Choose the date format for your appointments. The default format is YYYY-MM-DD. Additionally, select the type of reminder that should be attached to these appointments, either default or custom.