Appointment Reminders
Setting Up Appointment Reminders
Appointment reminders allow you to automatically send messages to contacts before or after their scheduled appointments. These messages can help reduce missed appointments, confirm attendance, support check-in, and collect feedback after a visit.
Creating an Appointment Reminder
Go to the Appointments page.
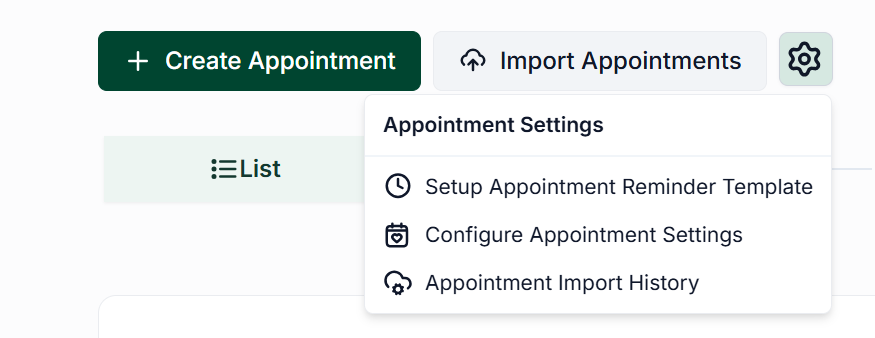
Select the cogwheel icon in the upper-right corner, near the search bar.
Choose Setup Appointment Reminder Template.
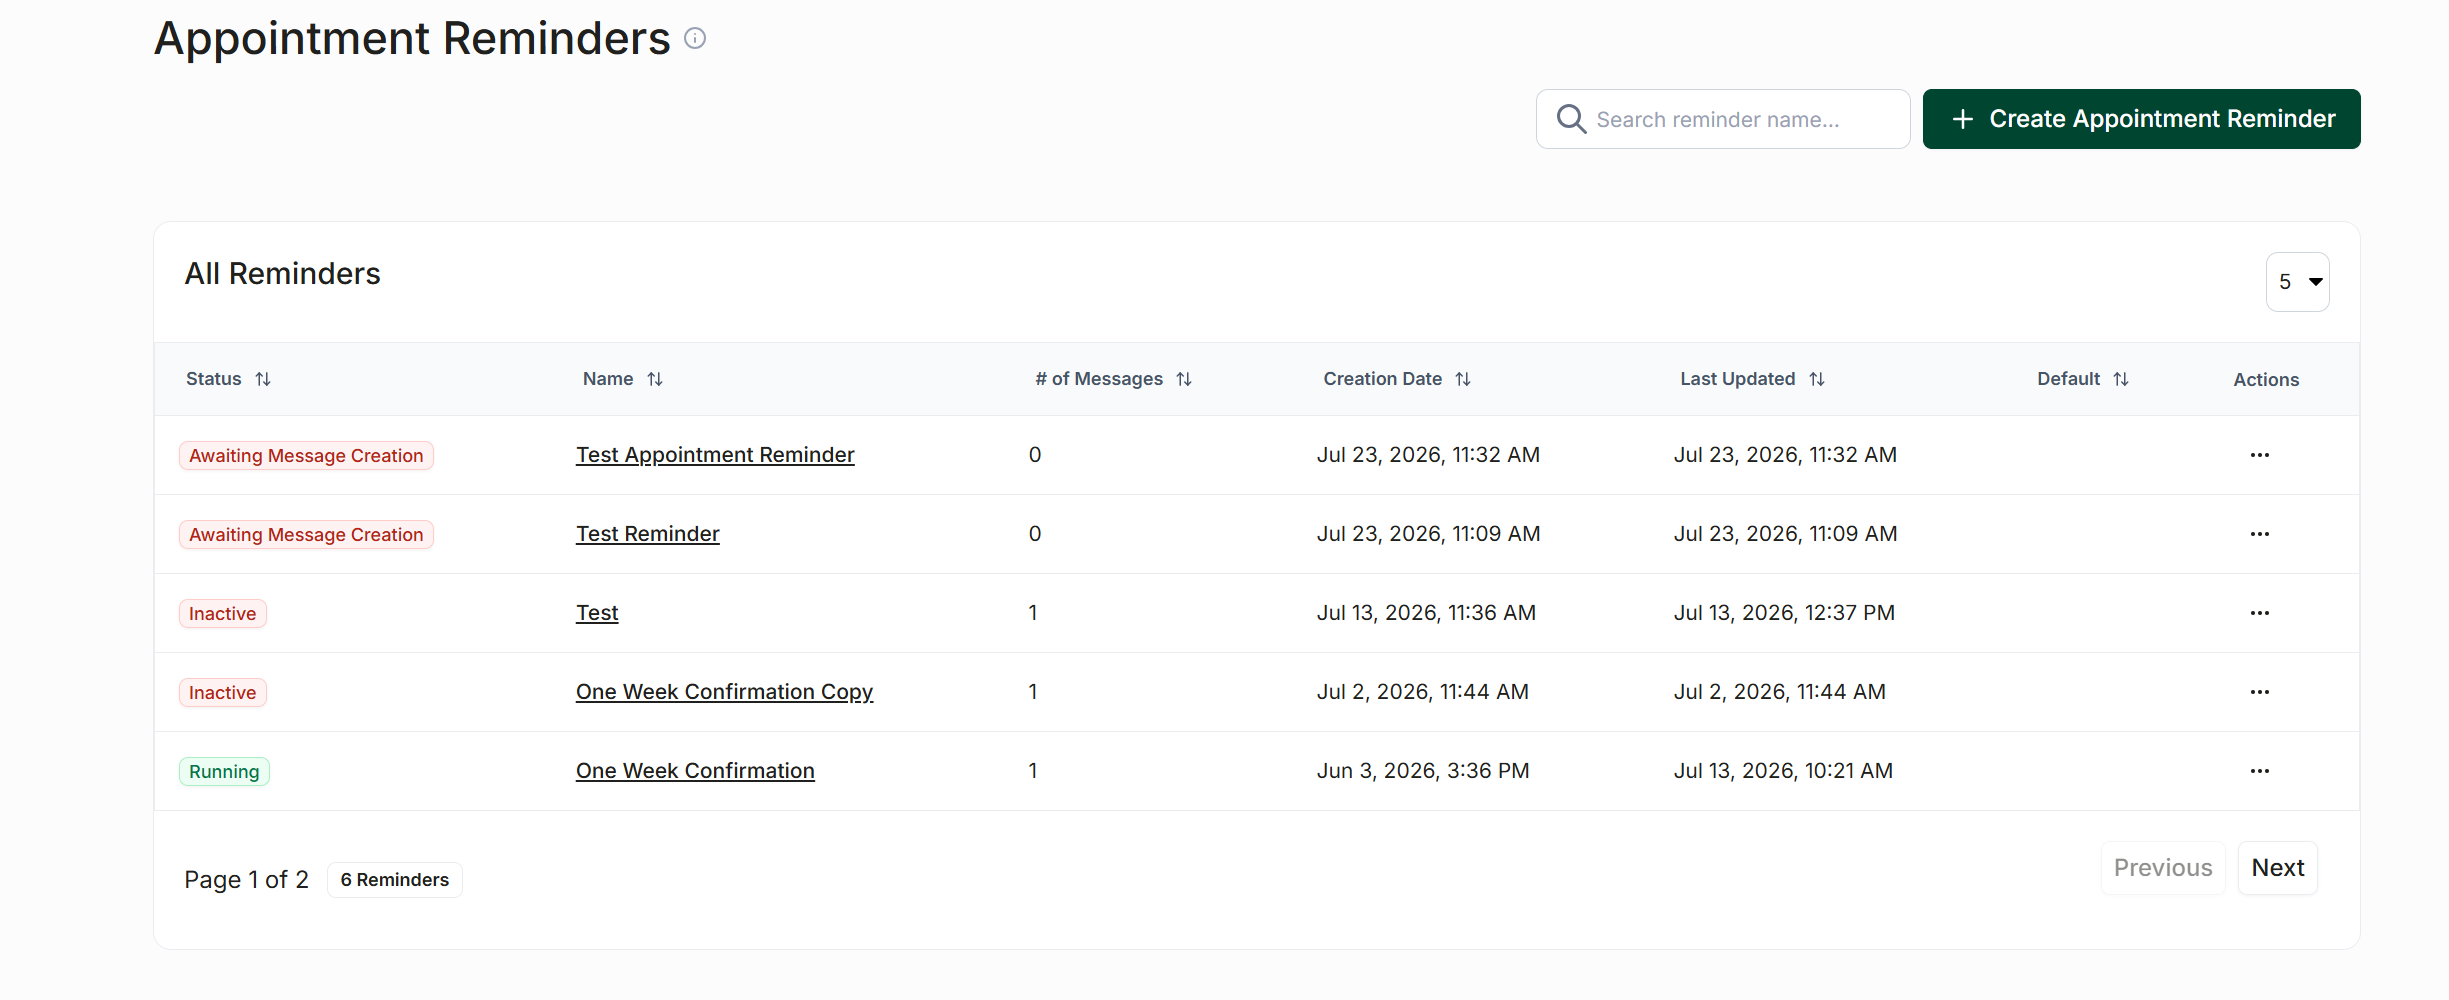
On the Appointment Reminders page, select Create Appointment Reminder.
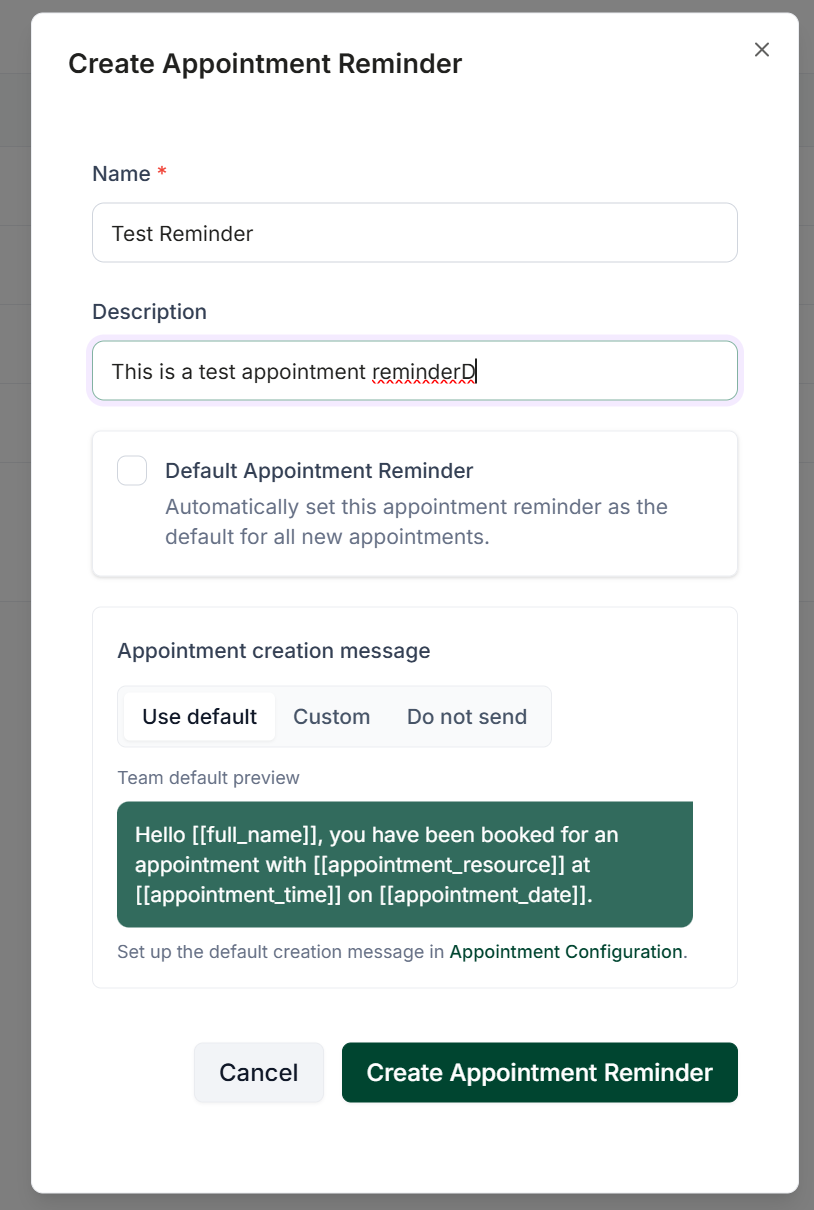
In the pop-up window:
Enter a name for the reminder.
Add a description.
Choose whether the reminder should be set as the default.
Optionally, enable an appointment creation message that will overwrite the default appointment creation message for any appointments that use this reminder.
Click Create Appointment Reminder to continue.
Message Types
An appointment reminder can include one or more steps. Each step contains a message that is sent at a specific time.
The following message types are available:
Reminder
Confirmation
Check-In
Post-Appointment Survey

Reminder Messages
Reminder messages notify patients about upcoming appointments and help reduce missed visits.
To create a reminder message:
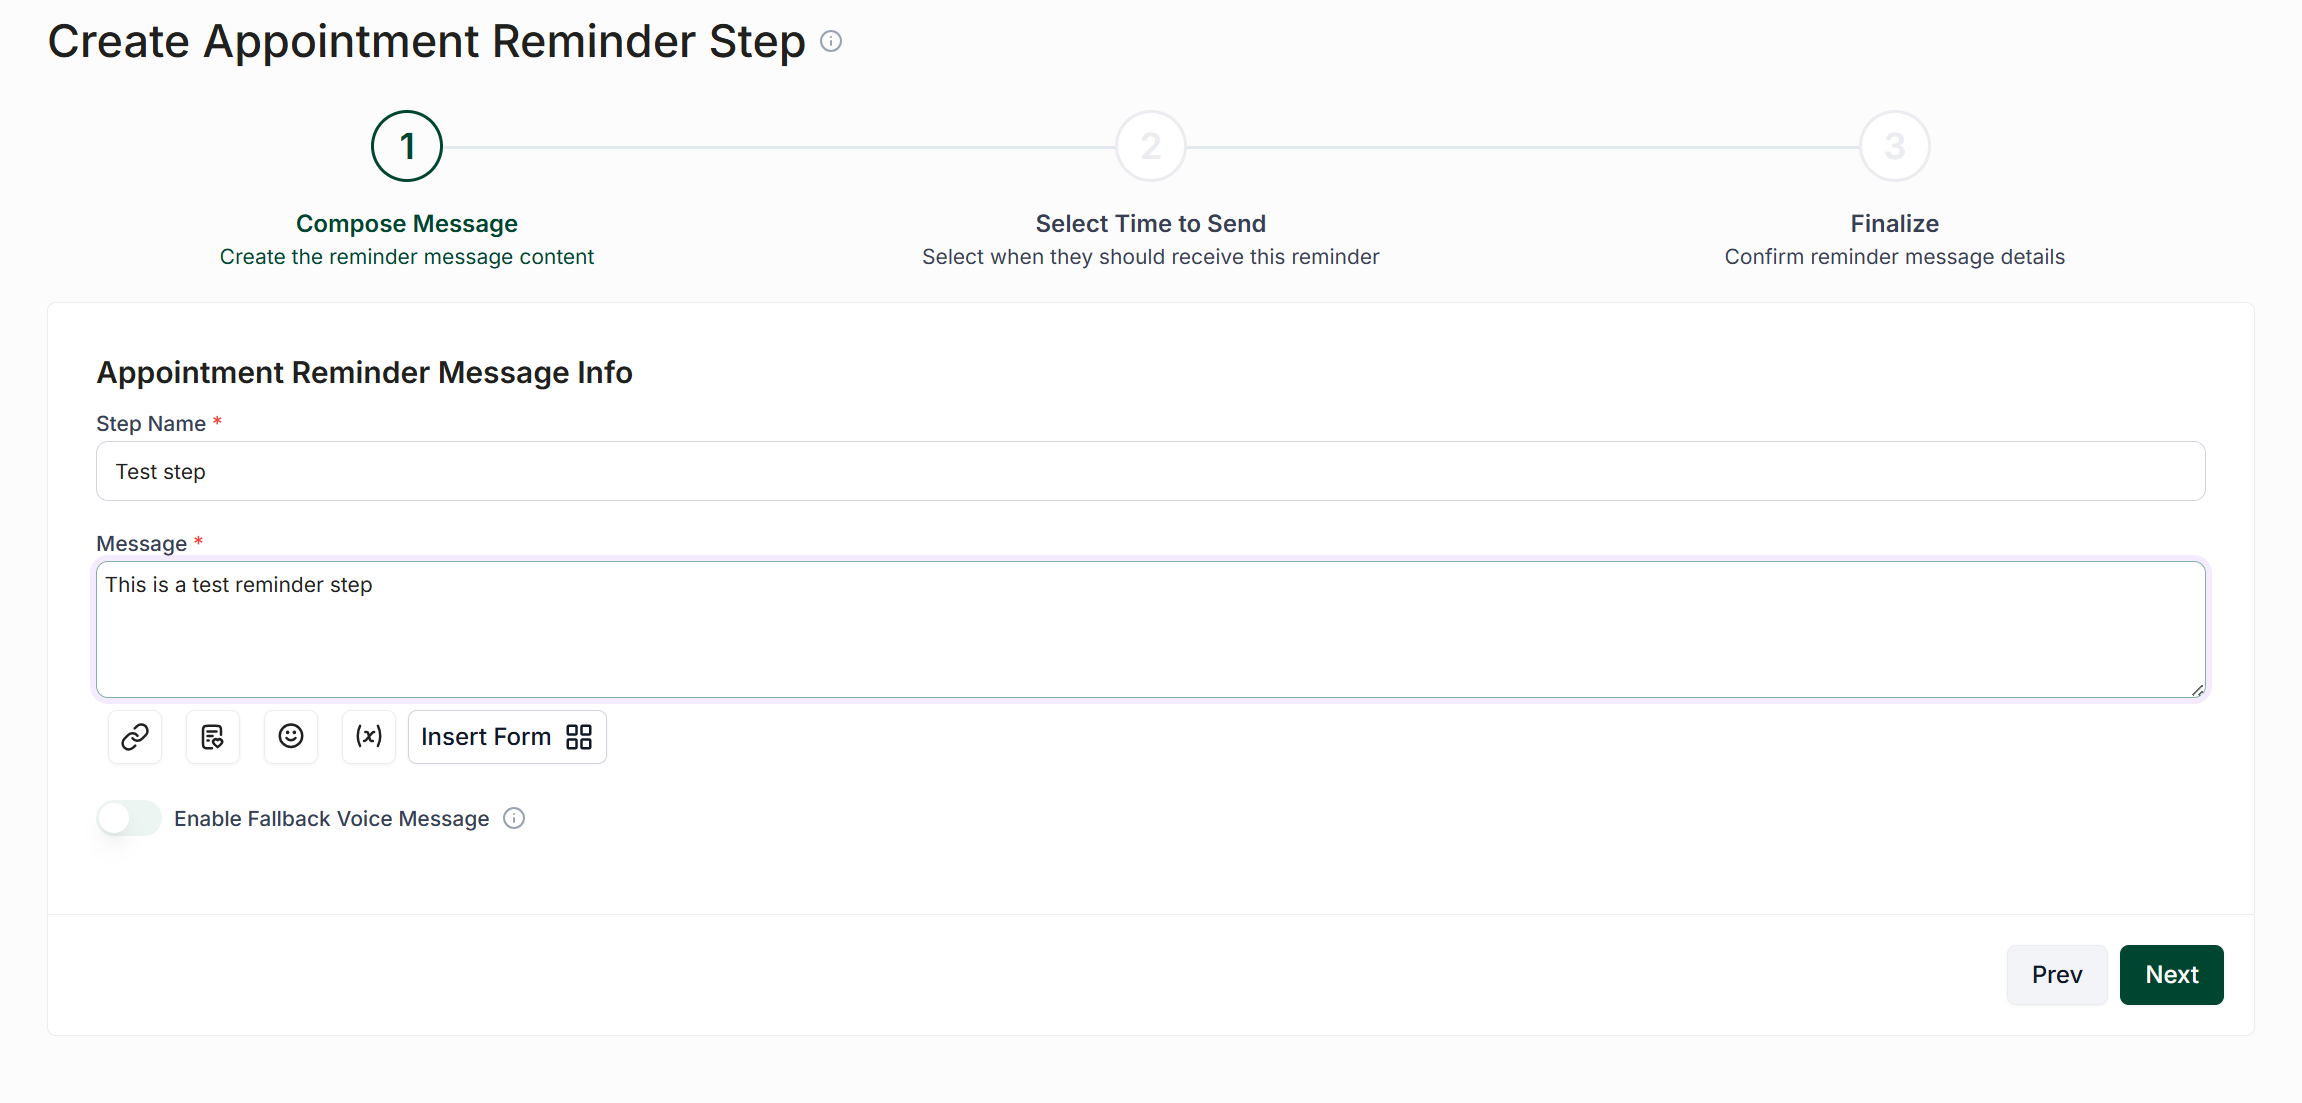
Select Reminder as the message type.
Enter a name for the step.
Write the message that will be sent to the patient.
Optionally, enable Fallback Voice Message.
A fallback voice message is sent if the SMS message cannot be delivered. You may also allow patients to confirm or decline their appointment through the voice message.
Select Next when finished.
Configure the Send Time
Choose whether the message should be sent before or after the appointment.
Before is typically used for upcoming appointment reminders.
After can be used for post-appointment tasks, such as scheduling a follow-up or picking up a prescription.
Next, select:
The amount of time before or after the appointment
The time unit, such as minutes, hours, or days
A specific time of day, if required
You may also enable Skip Step for Confirmed Appointments. This prevents unnecessary reminder messages from being sent after a patient has already confirmed and can help reduce message usage.
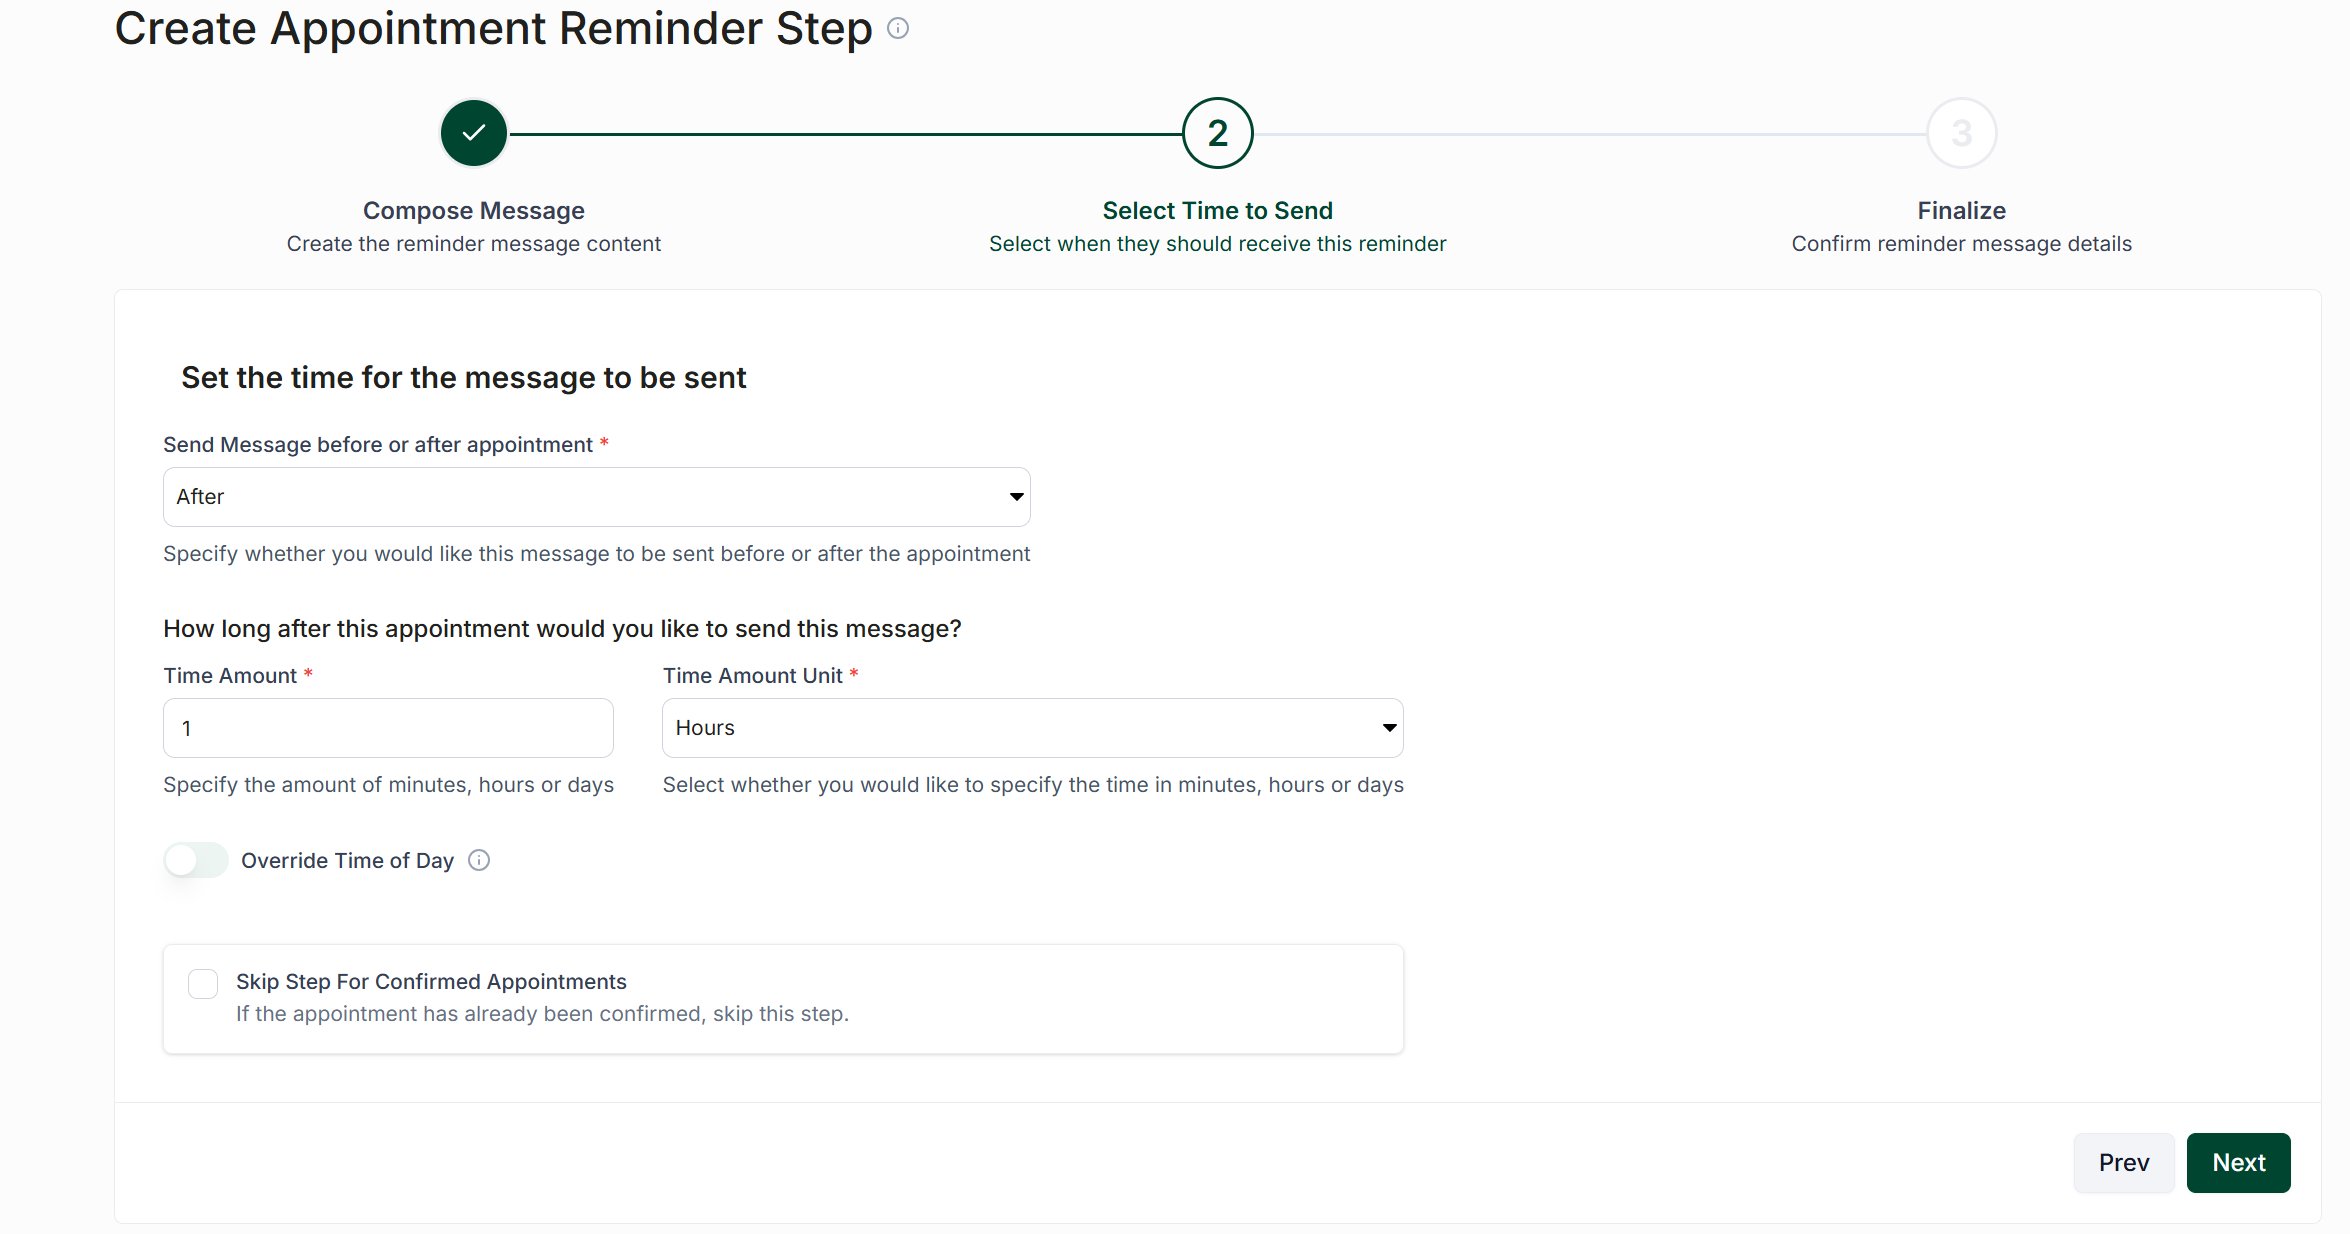
Select Next to review the message, then select Finish to save the step.
Confirmation Messages
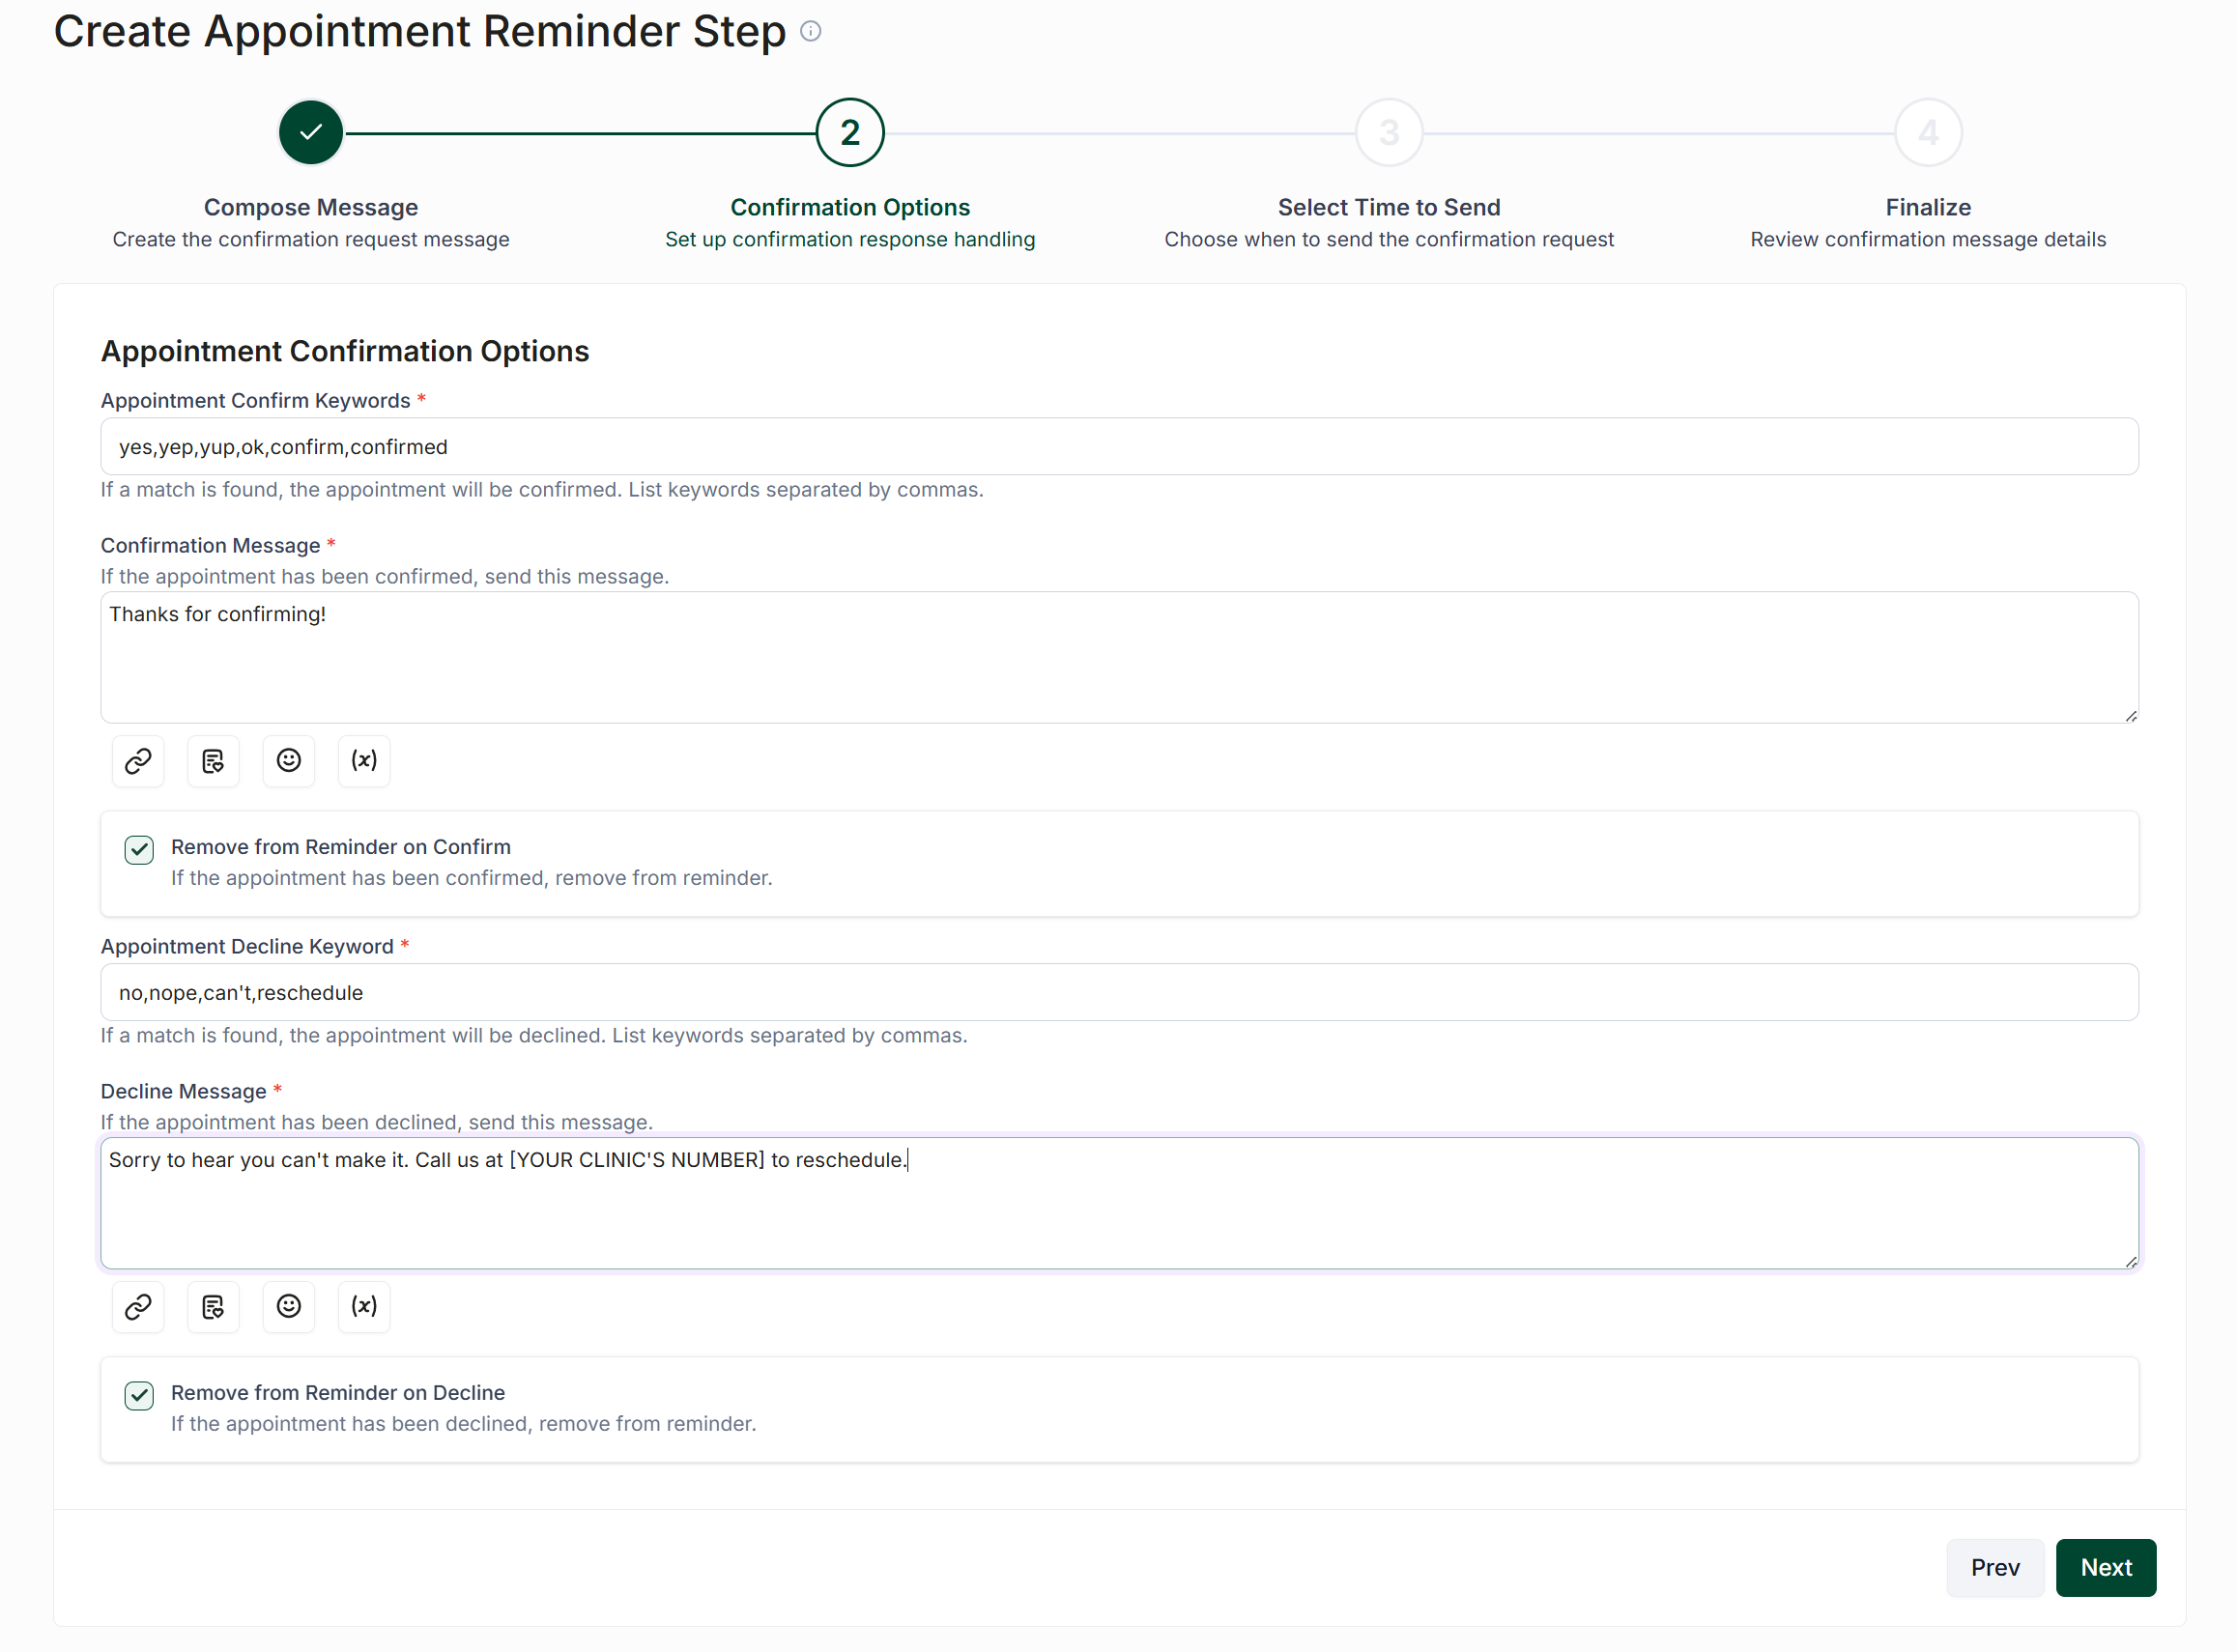
Confirmation messages allow patients to confirm or decline their appointment by replying with a keyword.
To create a confirmation message:
Select Confirmation as the message type.
Enter a name and description.
Optionally, enable a fallback voice message.
Select Next.
On the next screen, configure the keywords patients can use to respond.
Examples of confirmation keywords include:
Yes
Confirm
Yep
Yup
Examples of decline keywords include:
No
Decline
Reschedule
Nope
You can also create automatic responses for confirmed and declined appointments.
Optionally, choose to remove patients from future reminder steps after they confirm or decline.
Select Next and complete the remaining scheduling steps in the same way as a standard reminder message.
Check-In Messages
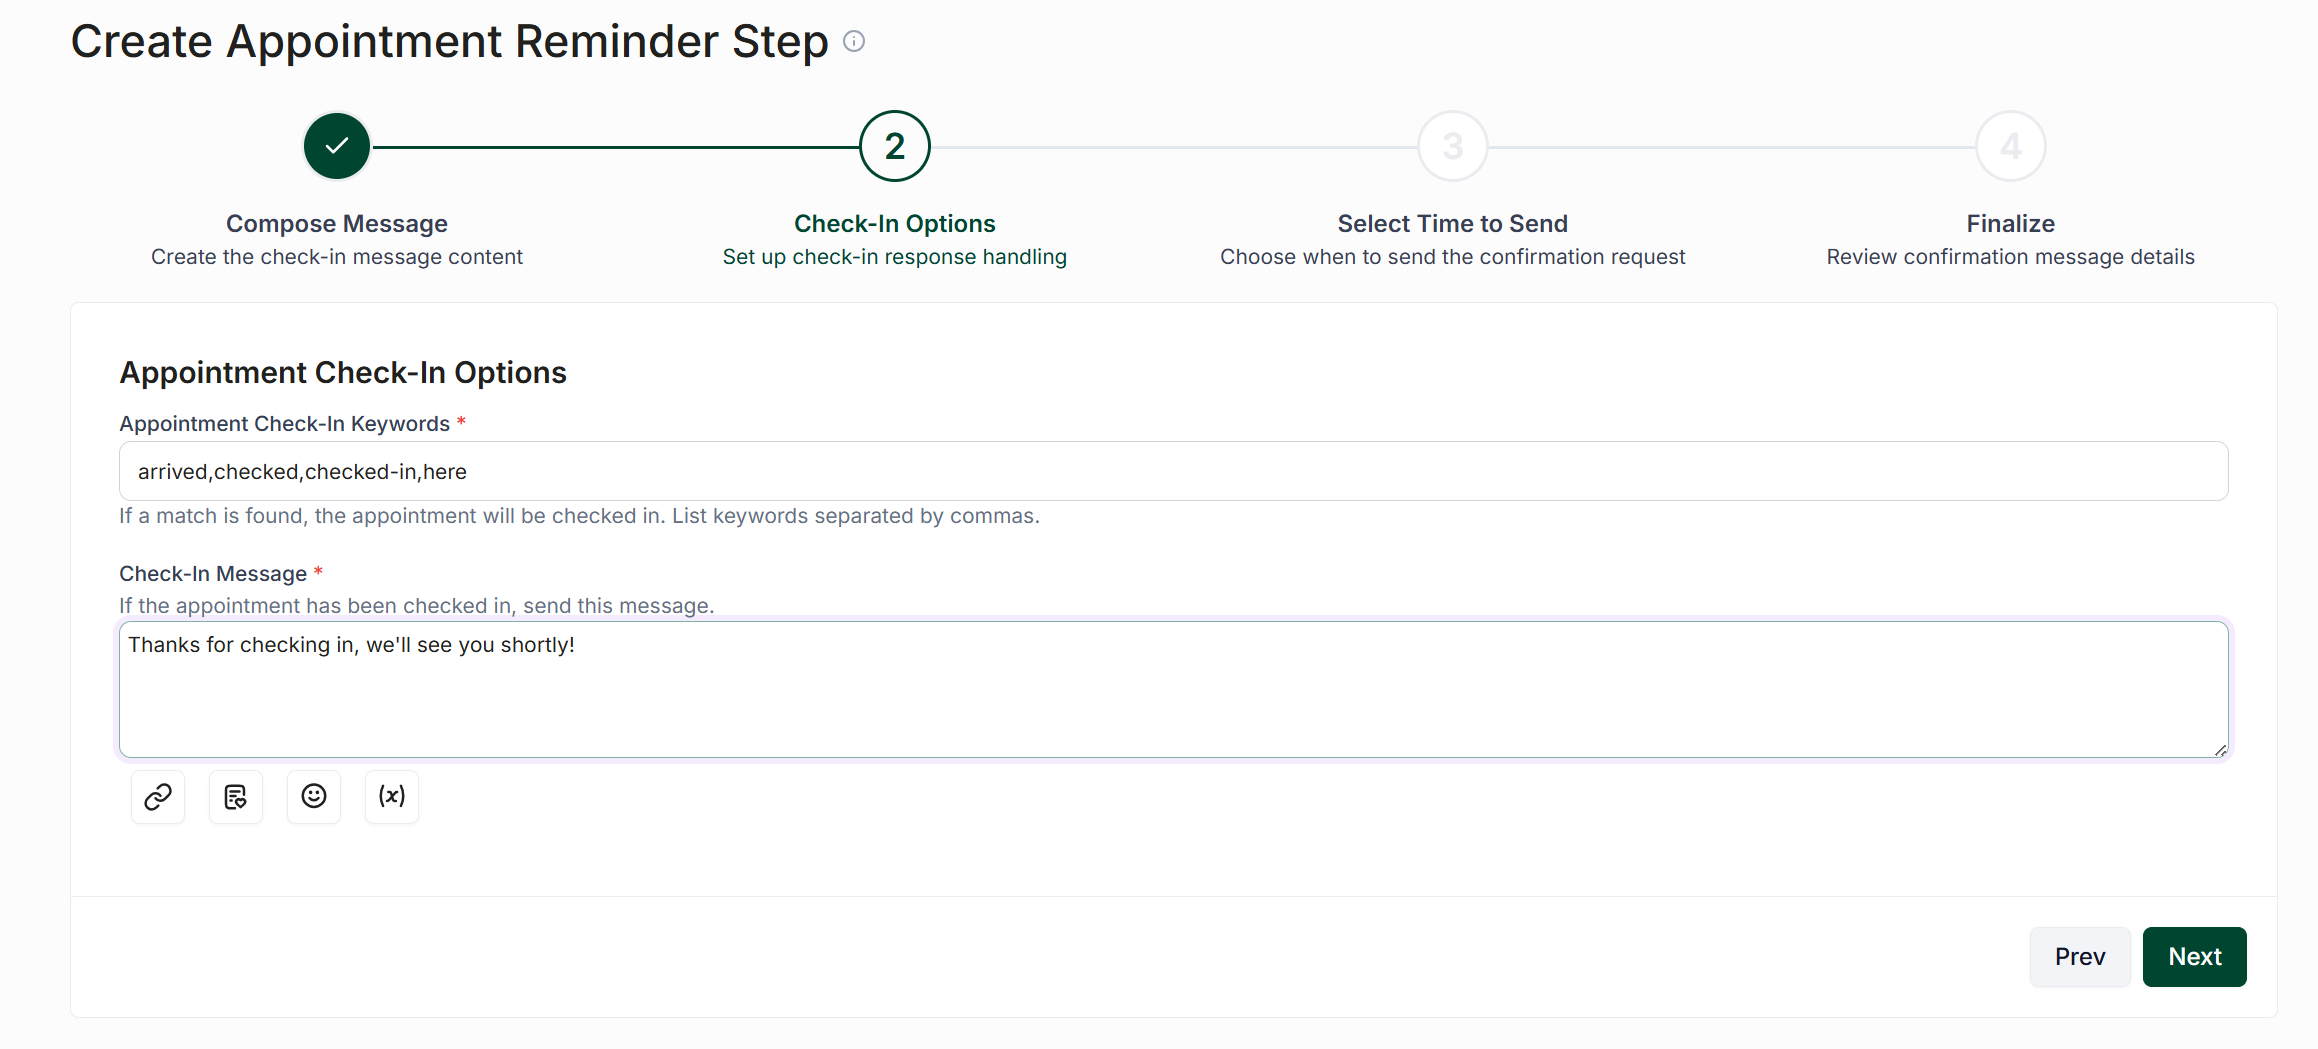
Check-in messages allow patients to notify your team when they arrive for their appointment.
The setup process is the same as creating a confirmation message. The main difference is that the keywords are used to indicate that the patient has arrived rather than to confirm attendance.
Follow the steps in the Confirmation Messages section to configure the message, keywords, responses, and send time.
Post-Appointment Surveys
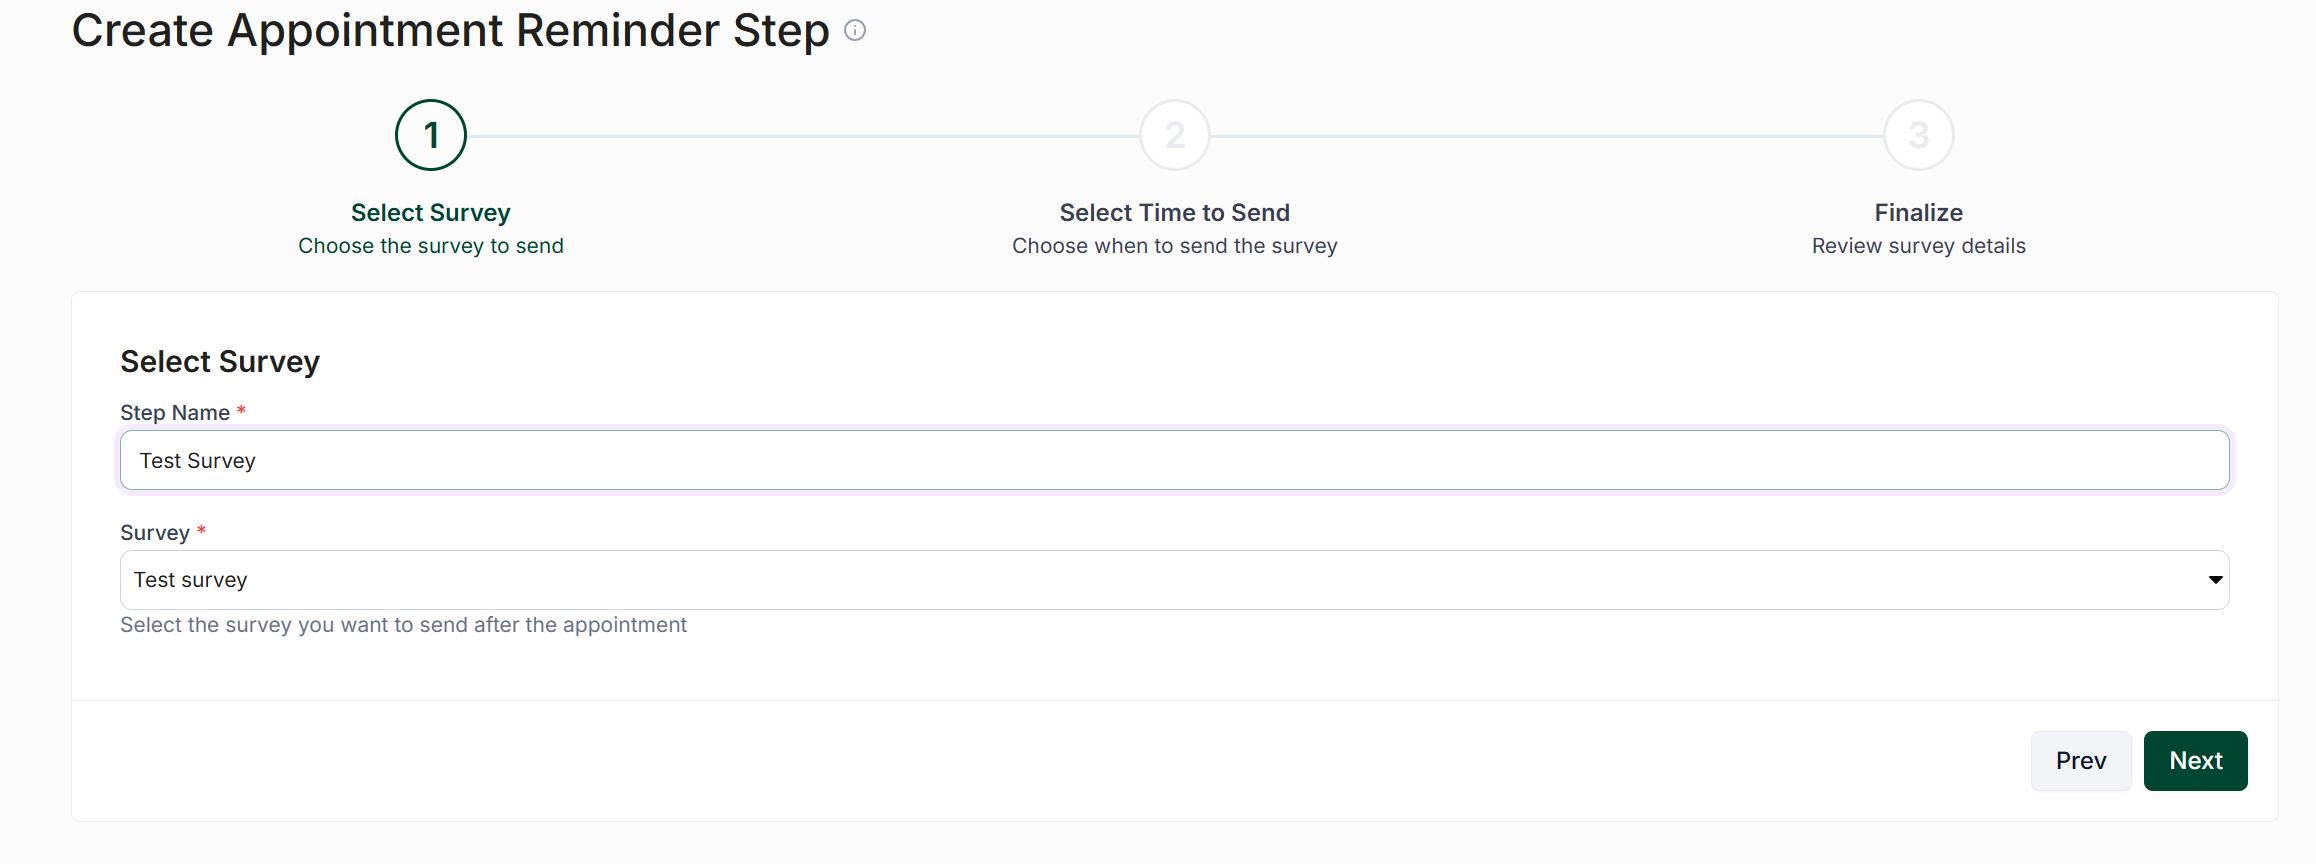
Post-appointment survey messages allow you to collect feedback from patients after their visit.
To create a survey message:
Select Post-Appointment Survey as the message type.
Enter a name and description.
Select an existing survey.
Configure when the survey message should be sent.
Review and save the message.
For instructions on creating surveys, see: Surveys & Polls
Activate the Appointment Reminder
After all reminder steps have been added:
Go to the upper-right corner of the reminder.
Select Start.
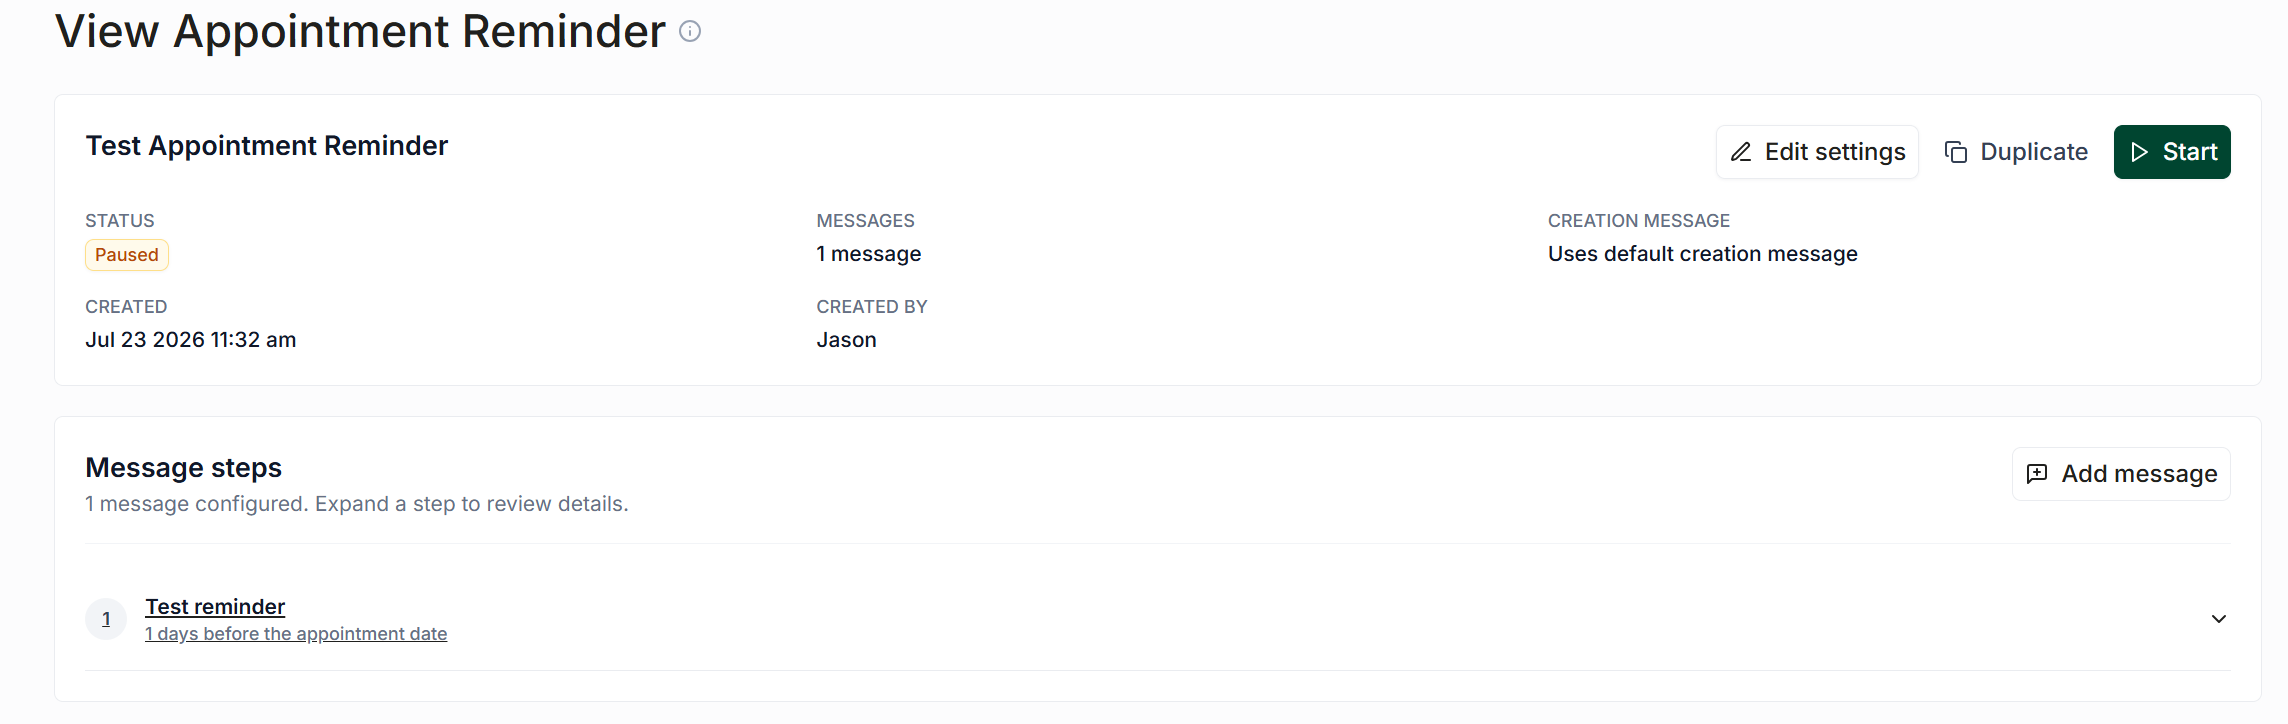
The appointment reminder is now active.
You can return to the Appointment Reminders page at any time to:
Edit the reminder settings
Update individual message steps
Pause or restart the reminder
Duplicate the reminder and use it as a template